

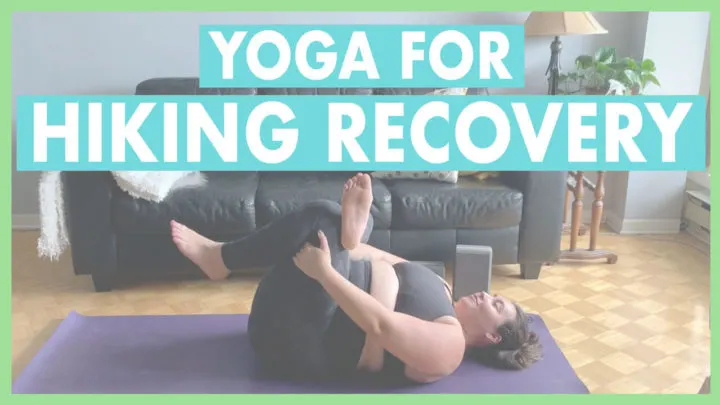
We all know that we’re supposed to stretch after a workout, but after a hike it’s just too easy to jump in the car and get home to shower and feel clean! You’re not alone if you skip on stretches after a hike, which is why this yoga for hikers includes post hike yoga stretches and a sequence that you can do when you get home, the day after, or the day after that.
Get ready to stretch out your tightest muscles and feel great. See you on the mat!
Post Hike Yoga Sequence
This post hike yoga sequence will lead you through the yoga poses for hikers that I recommend below. This is a slow and simple yoga sequence that gives you lots of time to move slowly if you’re sore and really sit into the areas that need the most stretching after a hike.
Recommend props
Post Hike Yoga Stretches
These are stellar hiking stretches that can be done by themselves, together, or in a sequence.

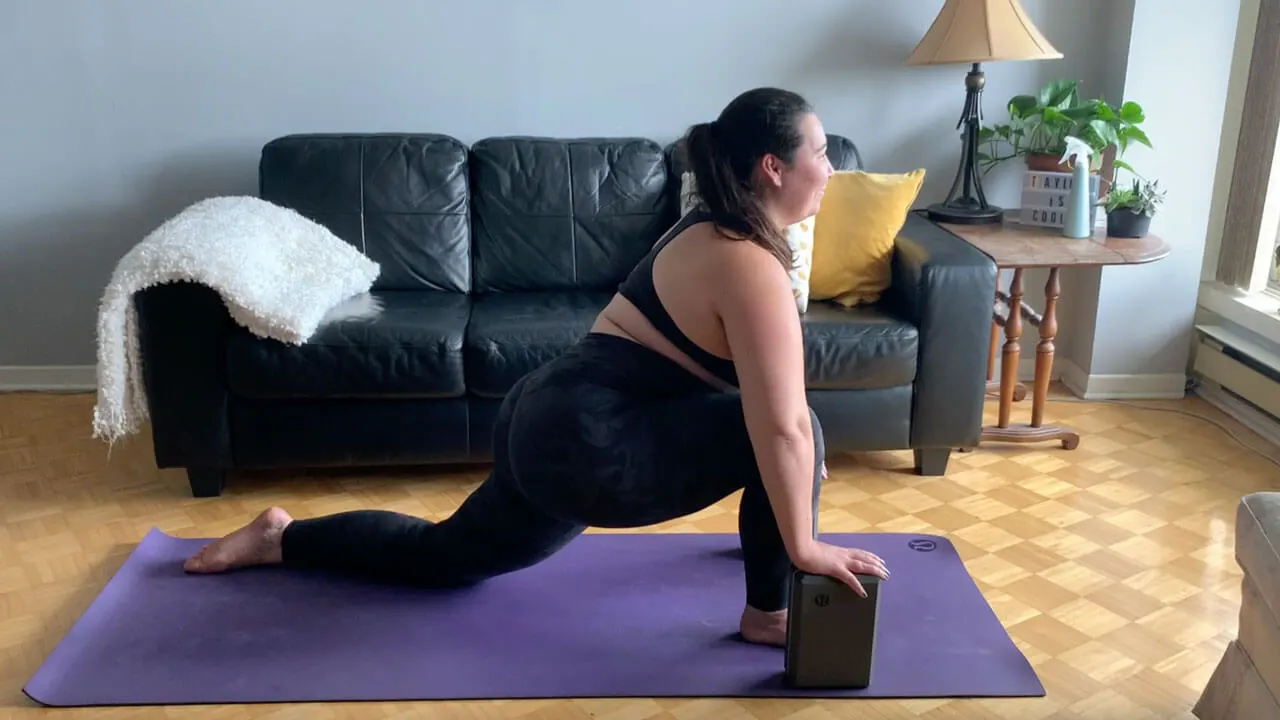
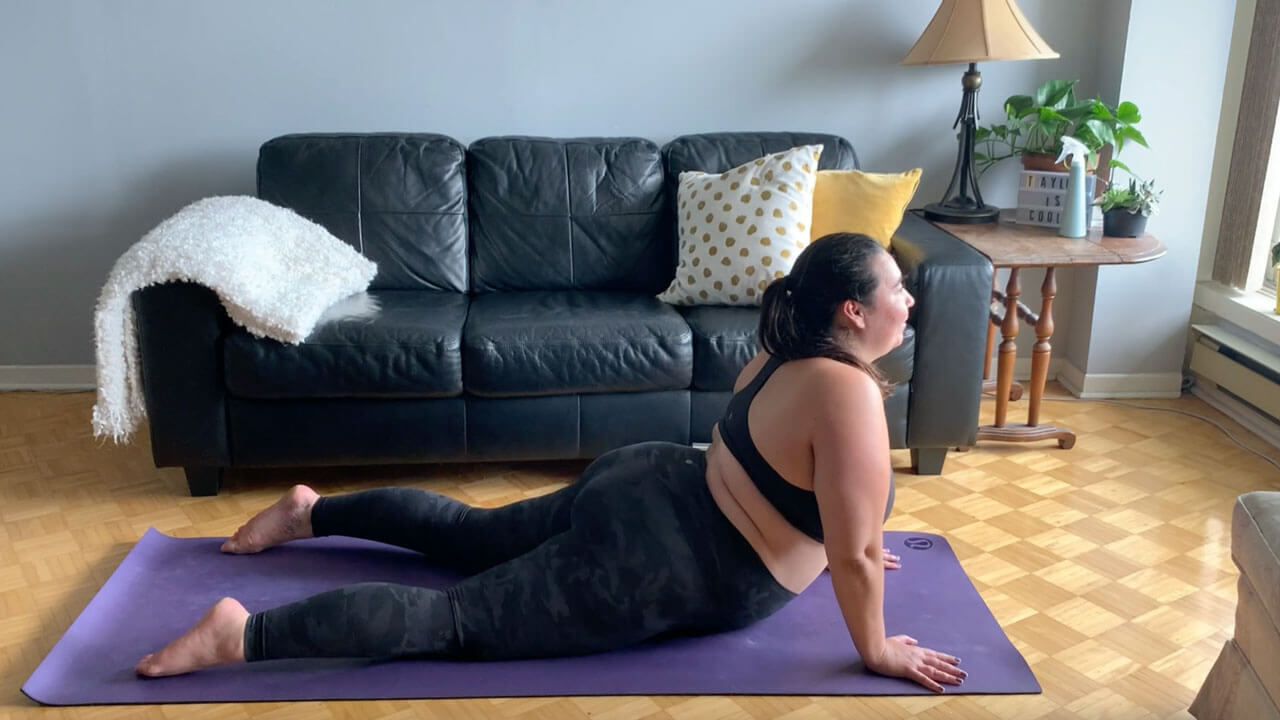
Low Lunge Pose
Great for your hamstrings, quads, and most importantly, your hip flexors that get worked a lot when hiking, low lunge is a great stretch to move into and out of. Each time you flow into this pose in combination with half splits pose (below) you’ll allow yourself to get a little lower and a deeper stretch.
From your hands and knees, step your right foot forward between your hands (option to use blocks to give yourself more space and bring the ground to you which may be needed if you’re tight!). Lean forward and adjust your right foot if your knee is going too far forward over your right foot. Pull your right hip back and your left forward to square your hips. Inhale to lengthen your spine by reaching the crown of your head up, exhale to allow your hips to melt towards the ground. Option to place your hands firmly on the mat, on your fingertips, on blocks, on your right thigh, or in the air. It’s totally up to you, choose wherever feels good!
Hold for 3-5 breaths and then begin to flow forward on the inhale, flow back on the exhale into half splits. Repeat as many times as feels good and then switch sides.
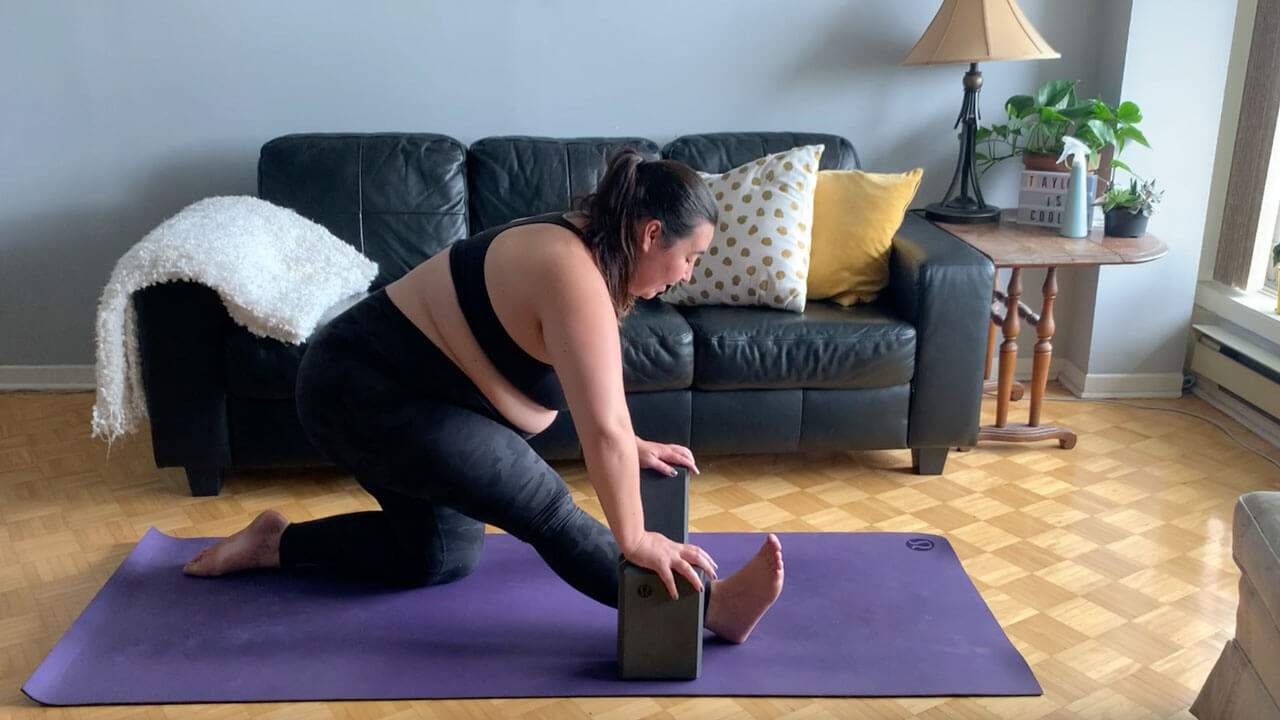
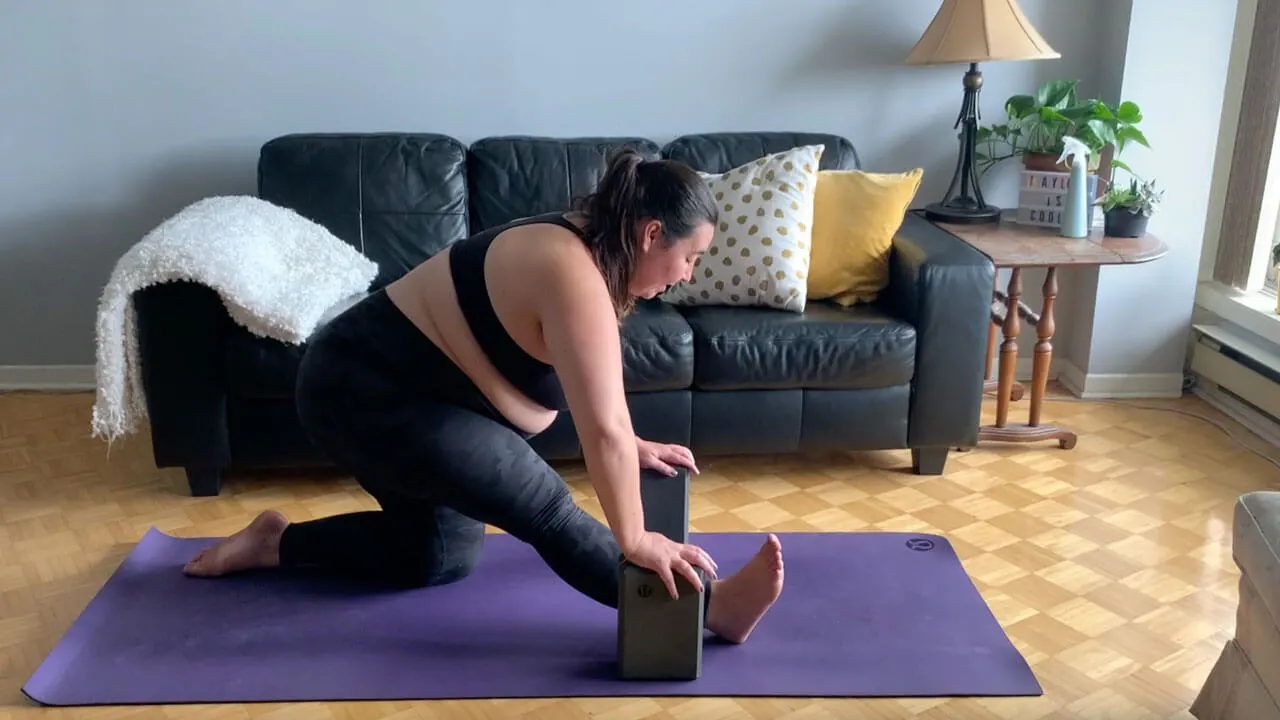
Half Splits Pose
A wonderful stretch for your hamstrings, half splits can be intense for a lot of people, especially after hiking, so be sure to breathe deeply into the areas where you feel it the most.
From low lunge with your right foot forward, rock your hips back so that your hips are stacked over your right knee (or a bit further back) and your right leg extends as you move onto your right heel. To make this pose more accessible, walk your hands back as you shift your hips or bring your blocks/props with you. Continue to pull your right hip back and your left forward to keep them square. Inhale to lengthen your spine, reaching the crown of your head forward, exhale to fold forward for more intensity, or stay put where you are.
Hold for 3-5 breaths and then move forward into low lunge on an inhale, and back into half splits on an exhale as many times as feels good.
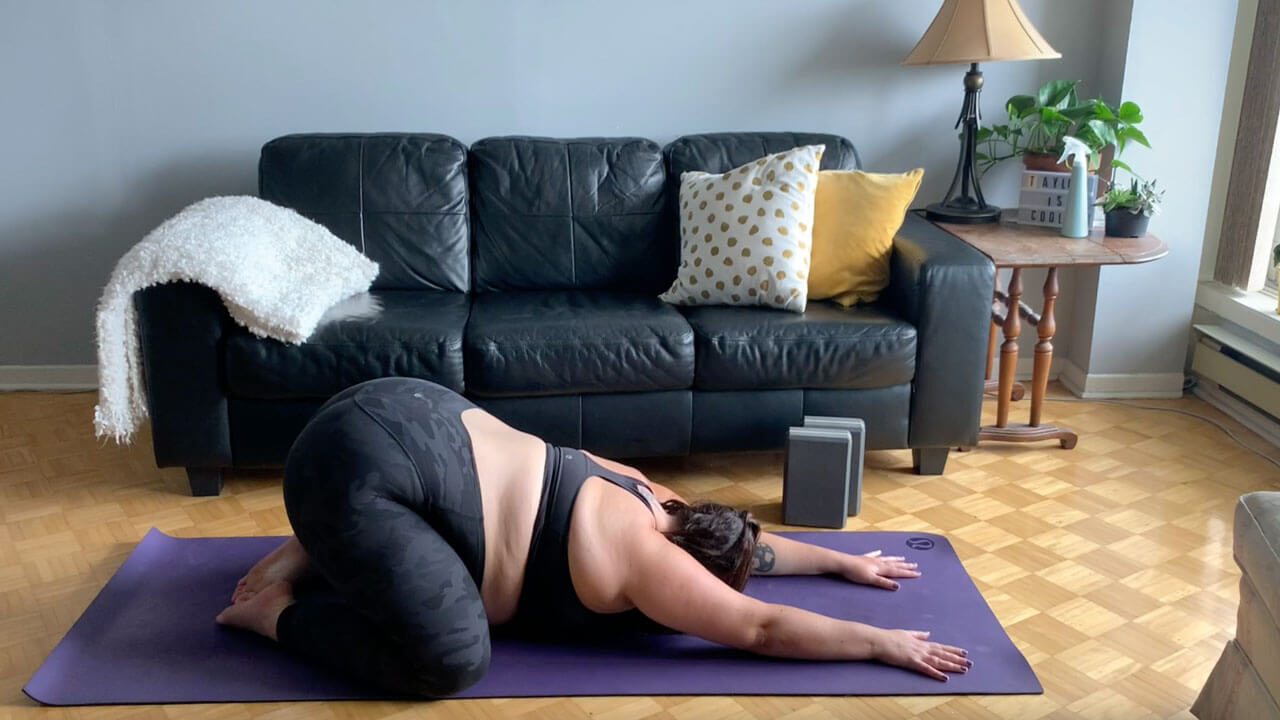

Child’s Pose
To truly let your spine relax, child’s pose is a top choice.
Sit on your shins and heels. You have the option to keep your knees together or to spread your knees wide to make space for your belly and deep breaths. Walk your hands forward and allow your forehead and chest to melt to the ground. Use a blanket, pillow, or block under your forehead if you feel it’s too far.
Place a rolled blanket or towel under your hamstrings if they’re tight and it’s too intense for your bum to sit on your heels.
Inhale to feel your ribcage expand, exhale allow yourself to melt into the mat. Allow your shoulders to fall away from your ears and allow your arms to be as relaxed or engaged as you’d like. Hold for 5 to 10 breaths.

Seal Pose
Get the crunch out of your spine with this simple backbend.
Lay on your stomach. Place your forearms on the ground, your shoulders stacked over your elbows and your fingers pointing forward. Allow your head to fall in line with your spine, which is usually just looking over the top of your mat. This is sphinx, stay here for a few breaths. If you want more intensity, move into seal pose by moving your hands to the top corners or your mat, fingers spread wide and pointed out at about a 45-degree angle, and then extend your arms. Stay here for a few breaths. If this feels good and you want even more intensity then walk your hands closer to your body.

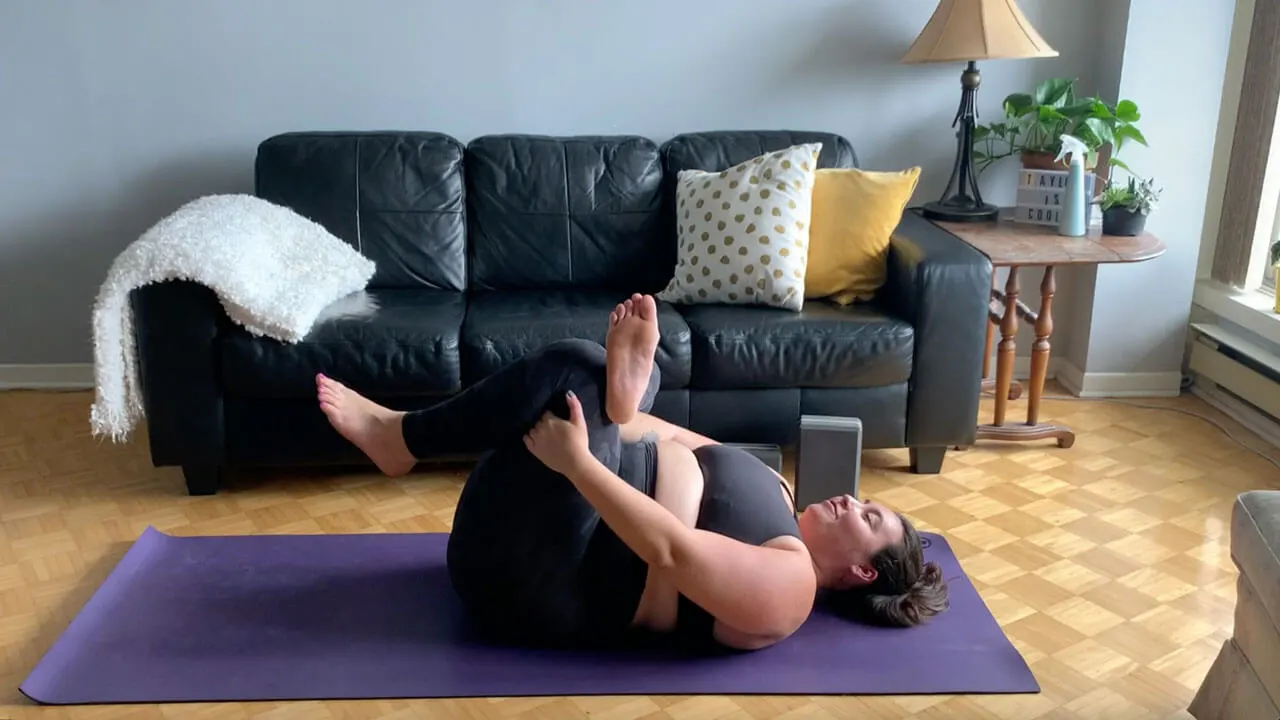
Reclined Pigeon Pose
Grab a strap or a small towel for this pose if you have tight hamstrings, short arms, or any difficultly reaching the back of your thigh.
Lay on your back with your feet planted on the ground in line with your hips. Extend your right leg up to the sky, turn your toes out to a 45-degree angle, and then place your right foot on the outside of your left thigh, just above your knee. Gently push your right palm into your right thigh to assist it in moving away from you. Stay here if this feels good.
For a deeper stretch, move your right hand between your thighs and your left around your left thigh to interlace your fingers on your left hamstring. If you can’t reach, use a strap or towel. Gently pull your left leg towards your chest. Use your right elbow to continue guiding your right leg away as you pull your left knee in line with your left shoulder. Hold for 5 breaths or longer and then repeat on the other side.
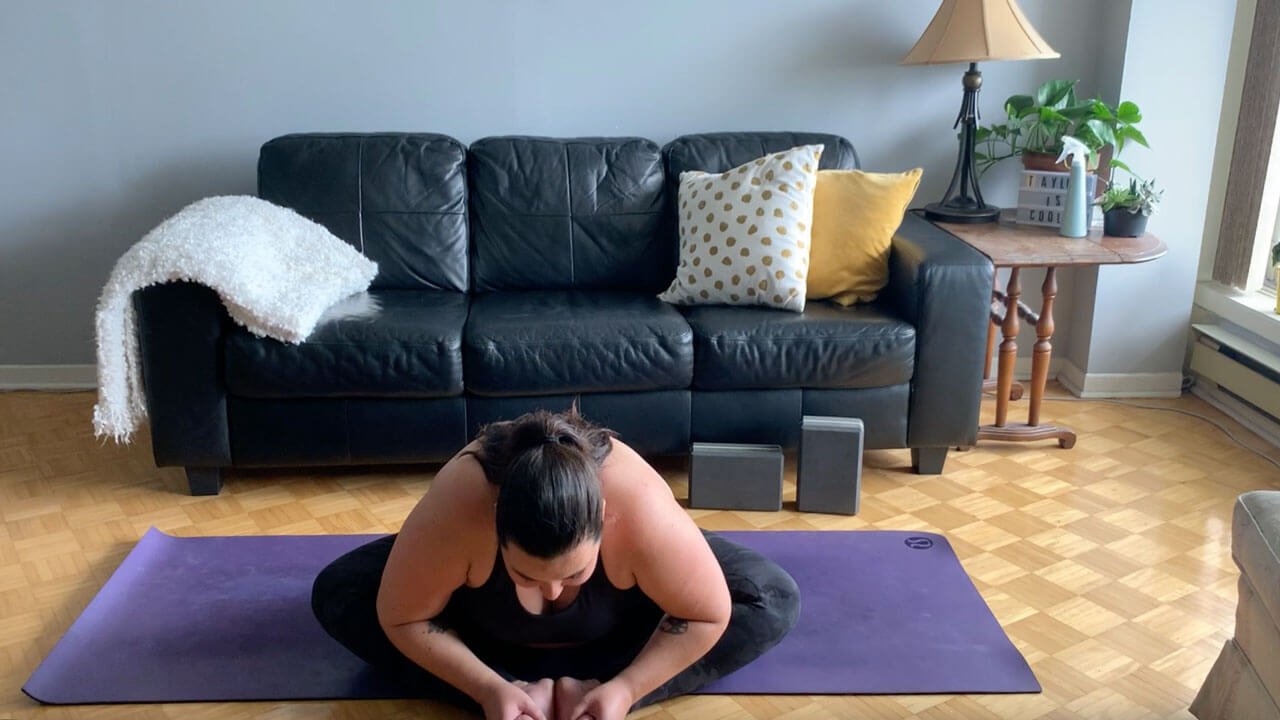

Butterfly Forward Fold Pose
A great pose for your inner thighs that too often go unnoticed and your spine, this pose can be pretty comfy!
Sit on your bum and bring the soles of your feet together. The closer your feet are to your groin the most intense the stretch will be. Place your hands on your feet or ankles. Inhale, reach the crown of your head up as you lengthen your spine. Exhale, fold forward with a straight spine. Inhale to lengthen, exhale to fold a little deeper. Repeat this breath 2 more times and then allow your spine to curl forward and relax. You may want to move your hands forward with your palms up to surrender here for more relaxation and comfort or keep your elbows pushing into your thighs to open your inner thighs more. Hold for as long as feels good!
Need more stretching? Find more classes by Taylor below!
Disclosure: This post contains affiliate links which I earn a small commission from and are at no additional cost to you.