
Like many beginners practicing yoga, I approached the practice with an attitude that I didn’t need yoga blocks. I thought I should be able to push myself to do poses and that using blocks was a crutch. Little did I realize how beneficial yoga blocks can be. Once I began incorporating them in my practice, learning when I needed them, and how they could advance my practice, I was hooked.
Using yoga blocks is so much more than just having them as a headrest or something to sit on. While they are wonderful for beginners and for those who find some poses inaccessible, they are also an amazing tool to deepen your practice through strengthening and flexibility. See yoga blocks as that, a tool.
In this guide, I cover how to use yoga blocks for beginner and intermediate yogis who want to make their practice more comfortable for their bodies and to challenge themselves. I’ve covered a pretty wide range of ways to use yoga blocks but there are even more opportunities to use them as well. Experiment, see what works for you, and approach your yoga practice with a beginner’s mind by incorporating blocks into poses where you didn’t think you needed them.
What is the purpose of yoga blocks?
Yoga blocks are used for three main things during your practice: supporting, lengthening, and strengthening. No matter where you are at in your yoga journey, I can guarantee that there is room in your practice to incorporate blocks to make poses more accessible, comfortable, or to deepen poses. Our bodies change and feel different from day to day, so even if you know how to feel good in many yoga poses, adding a block or blocks in can change up the game and make the poses feel even better or more challenging.
Lengthening
If you are ever not able to touch the ground or your toes, a yoga block is a good idea. You could not be very flexible (yet), have short arms, a large chest or tummy, or an injury that is stopping you from reaching wherever you’re trying to reach. The reason doesn’t really matter because adding in a yoga block or two will help you find the correct alignment, support, and stability. Through the practice of correct alignment, you will gain flexibility and may one day be able to touch wherever you’re aiming for. The important thing is that adding length will give you more space for alignment and most likely feel a lot better in your body!
Supporting
Yoga blocks are an excellent tool for helping to relax into poses. Even though a pose may seem okay to hold, it gets more difficult the longer you stay in it. A block can be used to support your head, areas that have been injured, such as placing a block under your knee(s) in a forward fold, your hips, and your spine.
Recommended yoga blocks: I personally use and prefer these lululemon blocks. My personal preference is foam over cork because they’re softer to rest my head on.
Strengthening
Using a block or blocks for strengthening can add an extra challenge, or it can help make poses that require strength more accessible (think crow pose). Using a block to strengthen helps with alignment by focusing on holding onto a block (for example, having it placed between your thighs in bridge pose). By focusing on holding onto the block in proper alignment you will automatically strengthen those muscles that often like to let go or take it easy, making the pose easier over time for your body. Using blocks for strengthening can also deepen poses by making them more challenging, like holding a block between your hands and extending your arms in a number of standing poses.
How many yoga blocks do I need?
The short answer is two. While many poses only require one, having an additional block is ideal for poses where your hands are on the ground (in this case your blocks), plus a second block is great for stacking, becoming a headrest, and more. In some poses, you may even want a third, but generally, two is suitable for the majority of practitioners.
Get to know more about props! Don’t miss tips & instructions on how to use a yoga strap and how to a yoga bolster, plus other best yoga props!
How to Use Yoga Blocks to Make Yoga More Accessible
These poses primarily focus on helping you to lengthen and support your body and are generally a great place for learning how to use yoga blocks for beginners.
Easy Pose
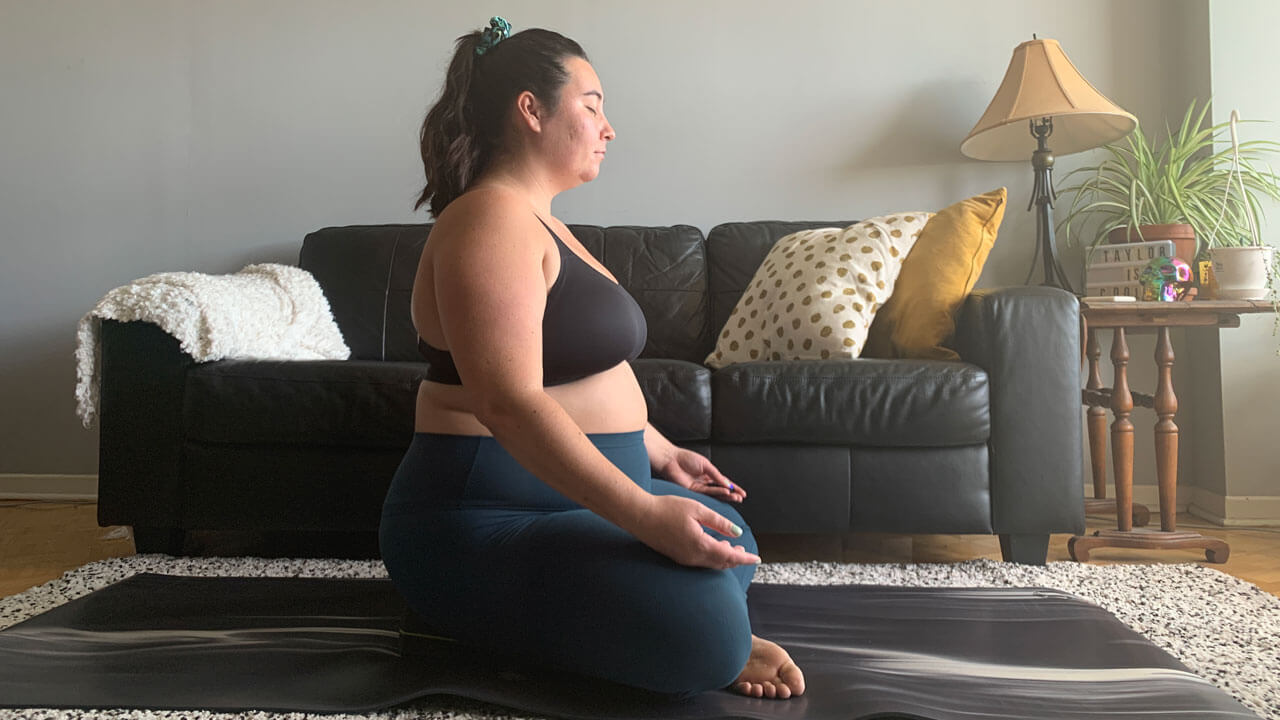

Otherwise known as just sitting with your legs crossed, easy pose is not always easy for some! If you’re feeling tight or notice that you’re slouching try placing a block (at the lowest height) under your sit bones to help your spine lengthen. Sit on the edge of the block or as far back on the block as feels good. Your pelvic bone will tip forward slightly.
Thunderbolt Pose
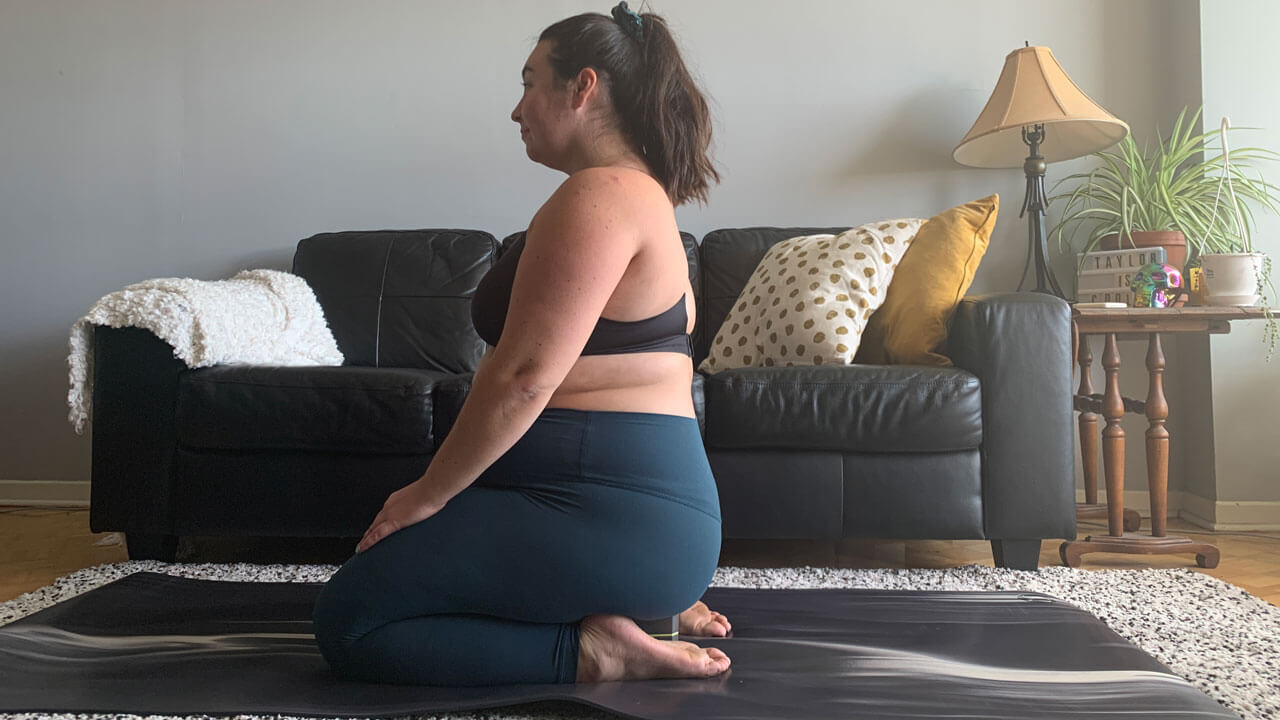

This pose is sitting on your shins with your feet tucked under you. This can feel like too much for many if you’re sitting here for a while or are tight across the tops of your ankles and feet. Place a block (or two) on the lowest or middle height between your legs and sit on it.
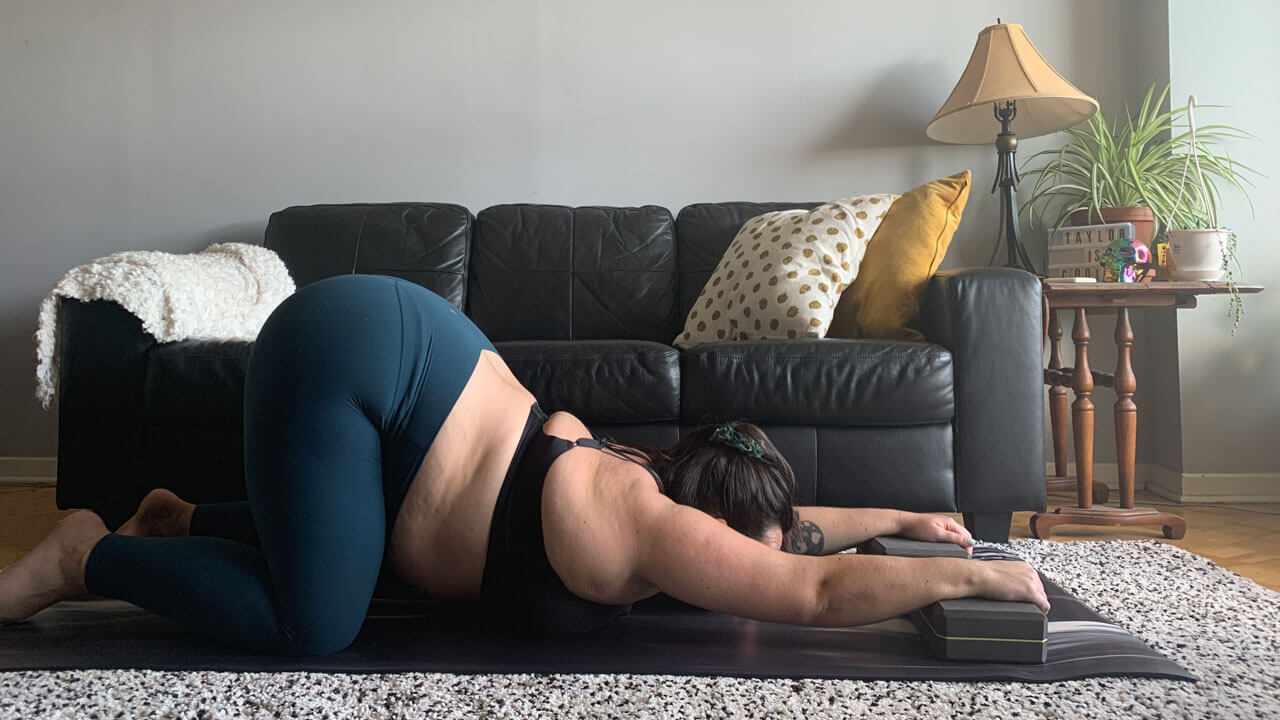
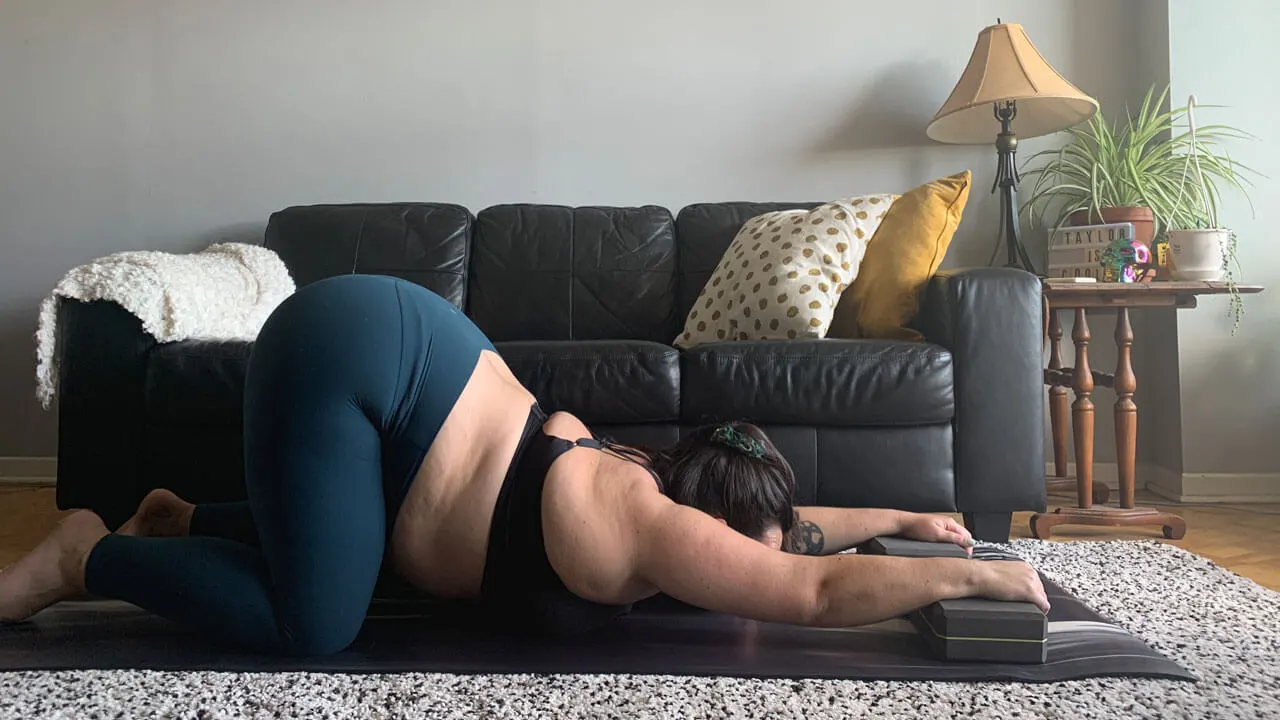
Child’s Pose
In any variation of child’s pose, if your head doesn’t touch the ground then place a block under your forehead to bring the ground to you, allowing your spine to lengthen.
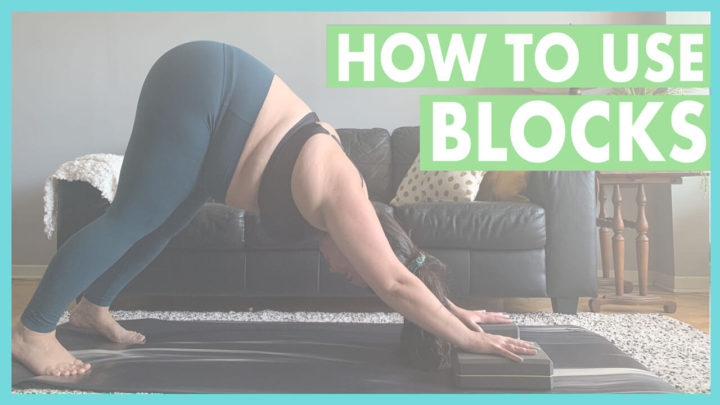
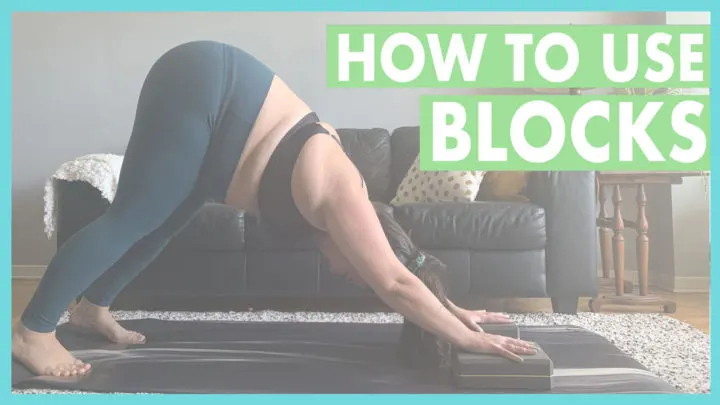
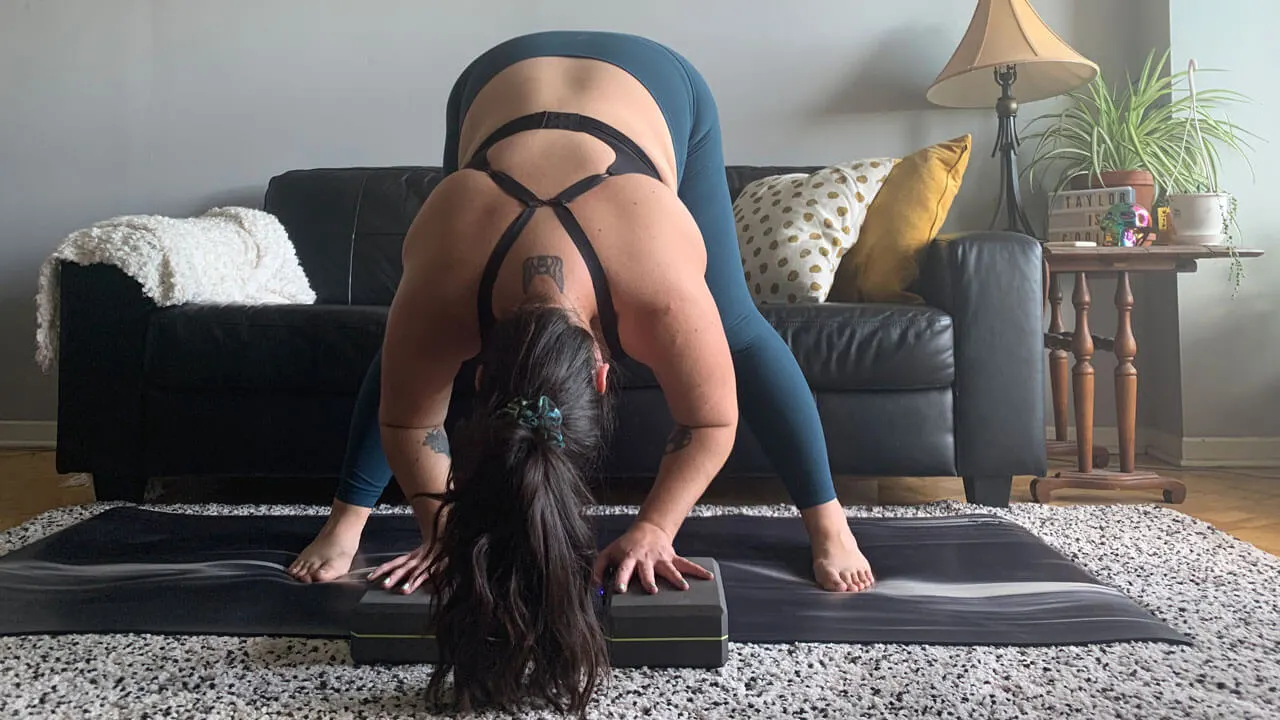
Downward Facing Dog
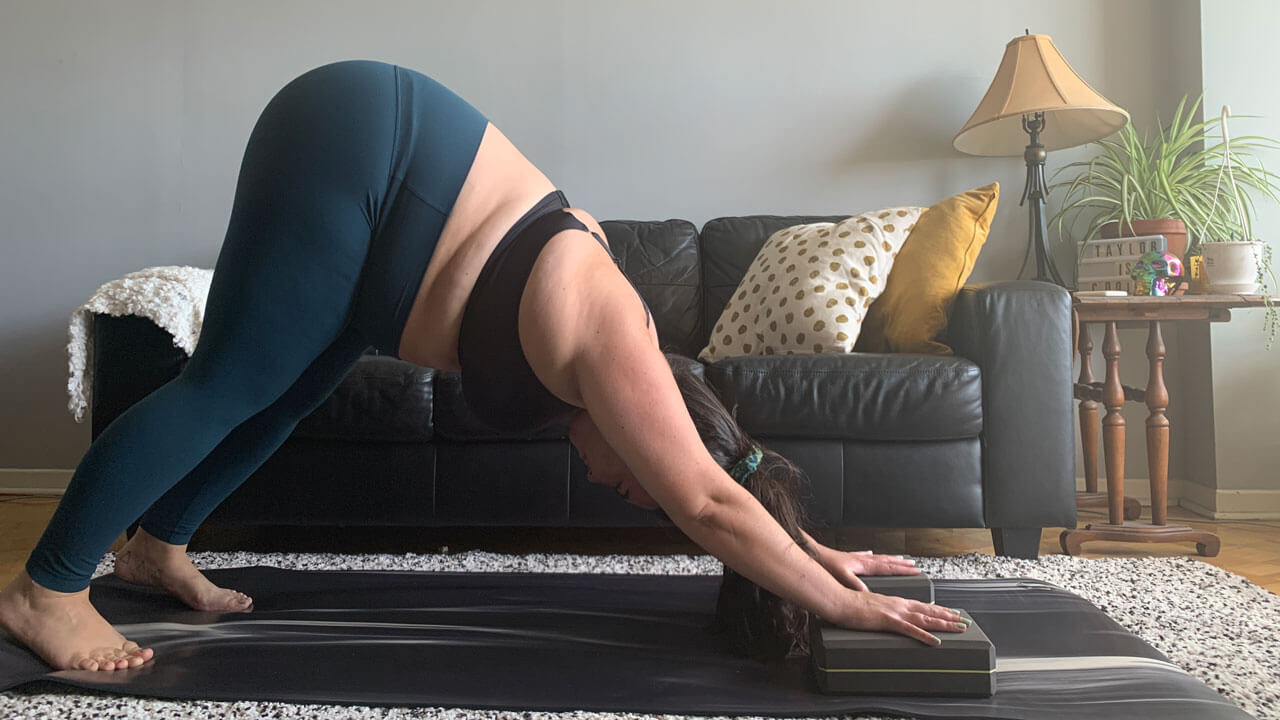
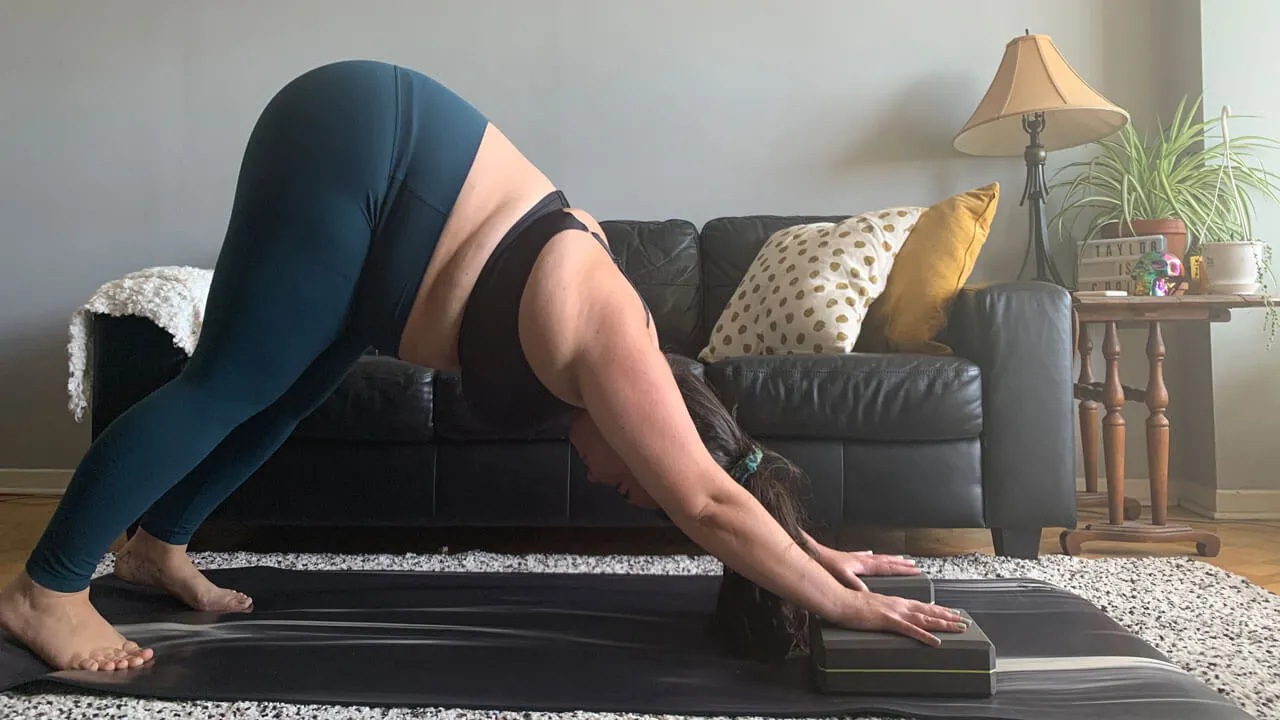
Try placing a block under each hand, shoulder-width distance apart, to give your body more space to lengthen your spine. This also takes some pressure off of your wrists.
Upward Facing Dog
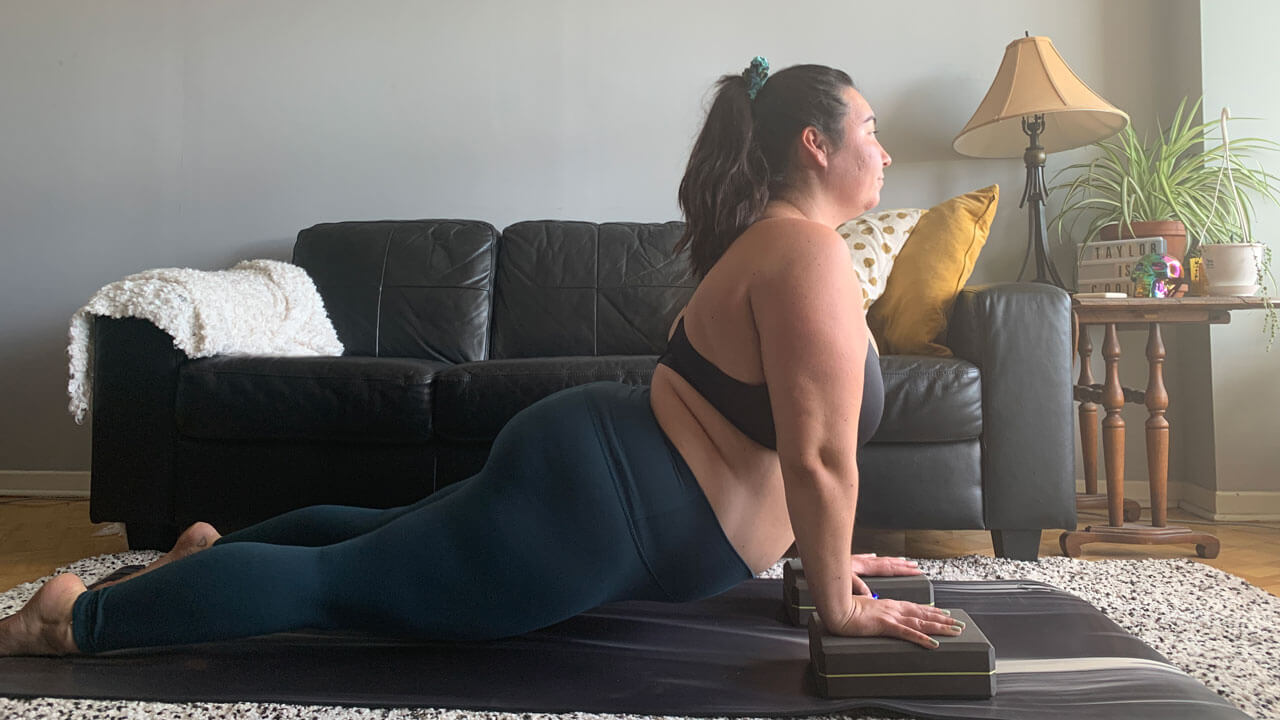

If you find that you don’t have enough space under your hip flexors when practicing upward facing dog, use a block under each hand to lengthen your arms and give your spine more space.
Standing Forward Fold
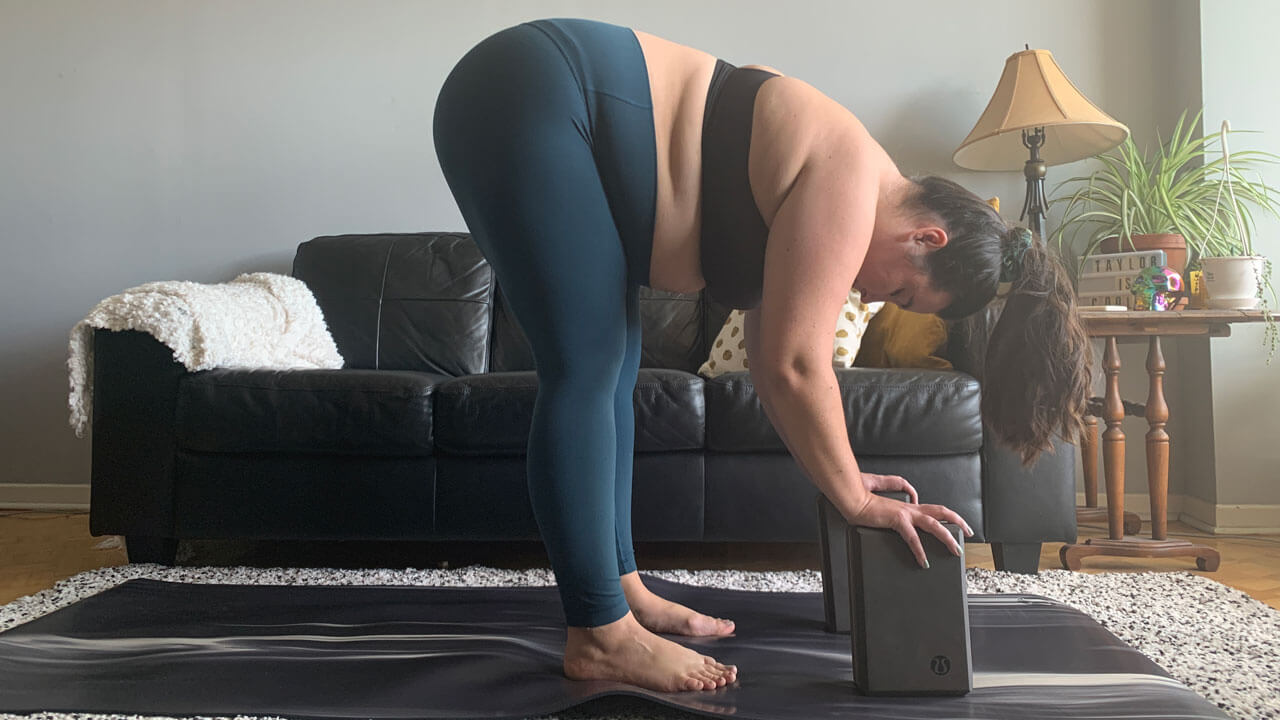
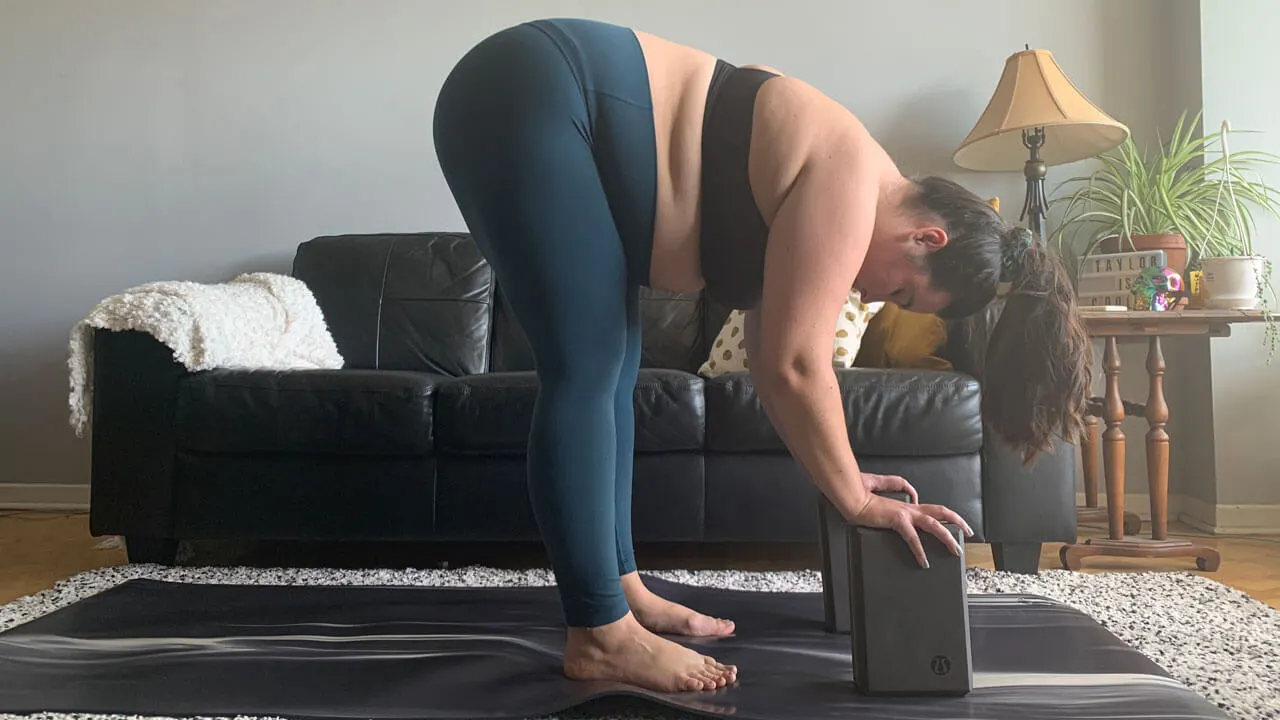
If you don’t always want to bend your knees generously and want to feel more of a stretch along the backside of your legs, place a block under each hand, at any height, to bring the ground to you.
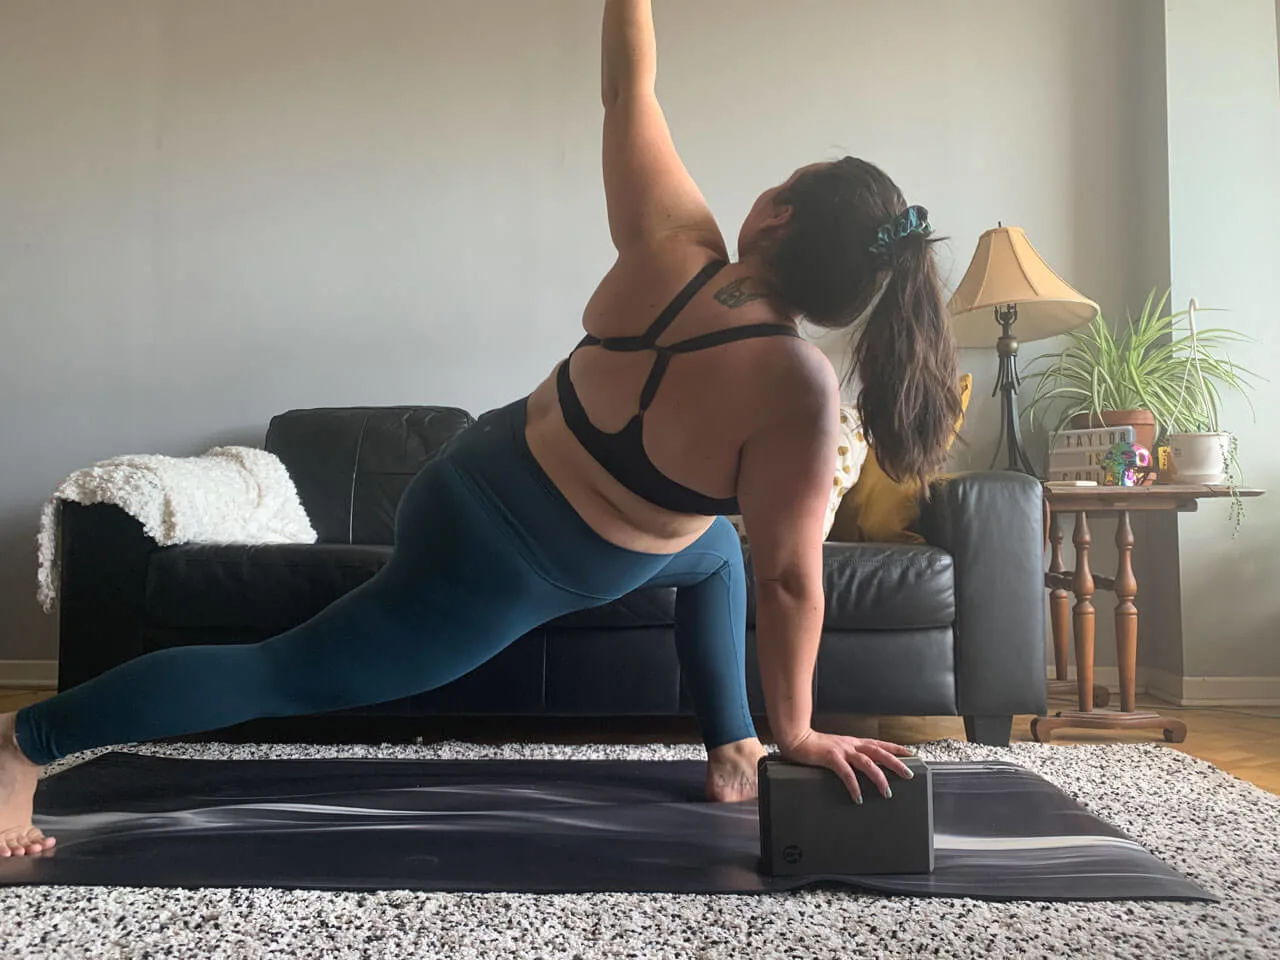
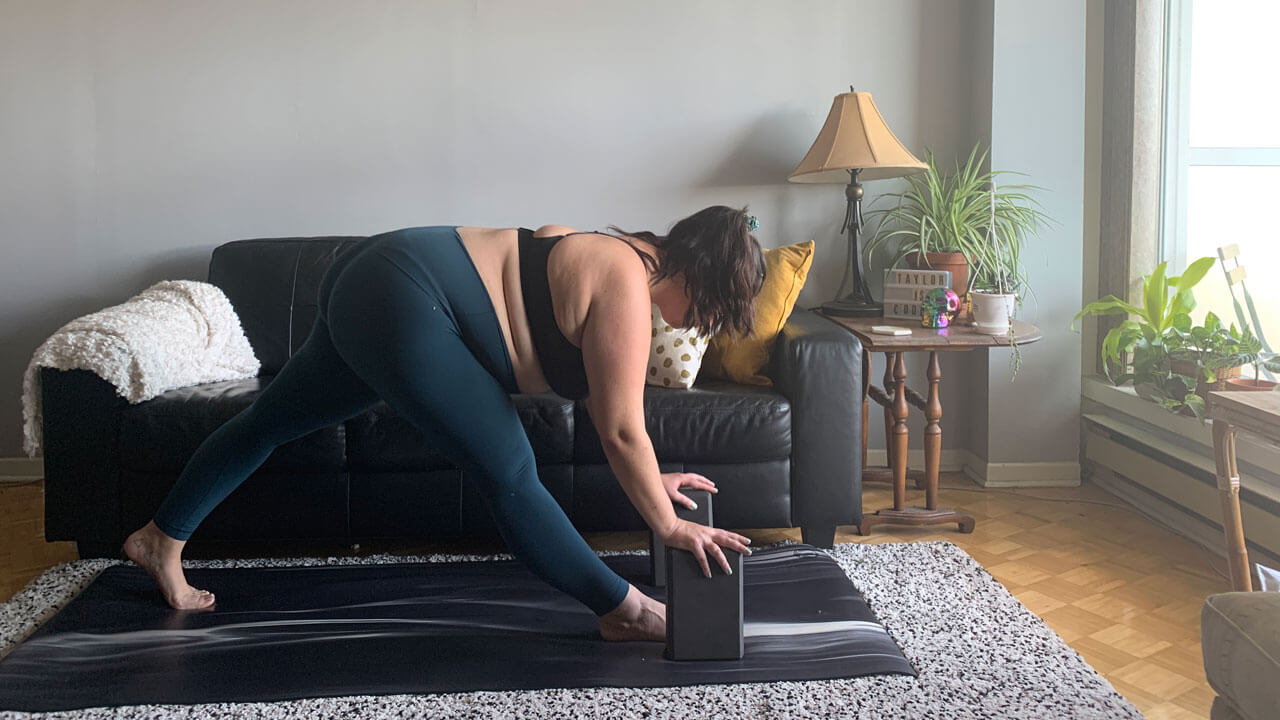
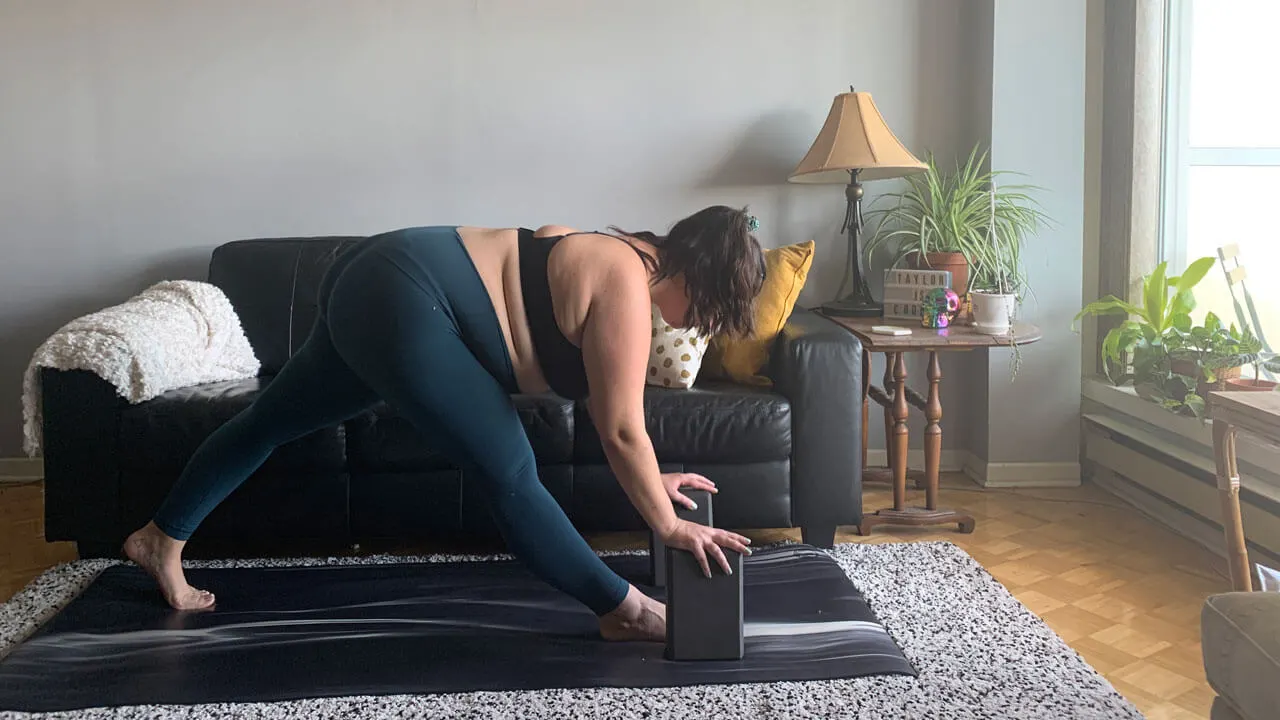
Low Lunge

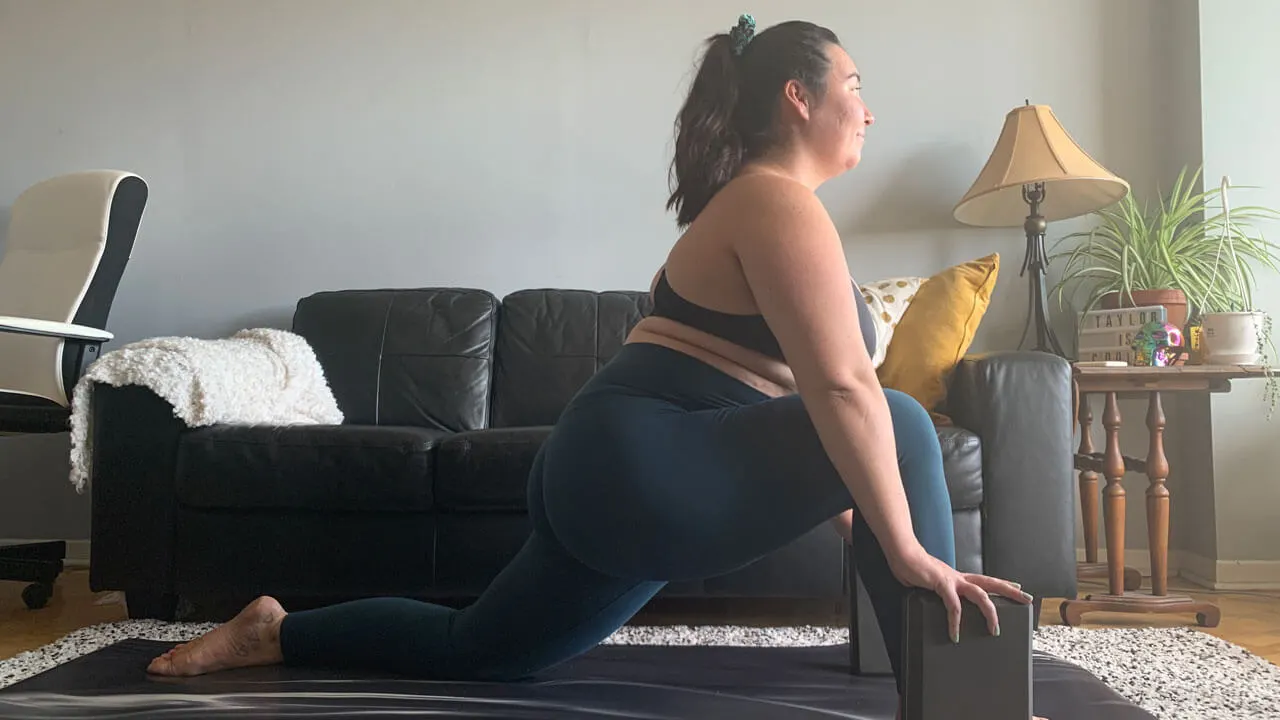
If your fingertips are just barely touching, or not at all, place a block under each hand, at any height, to give your arms length which will allow you to lengthen your spine, lunge deeper, and open your chest more.
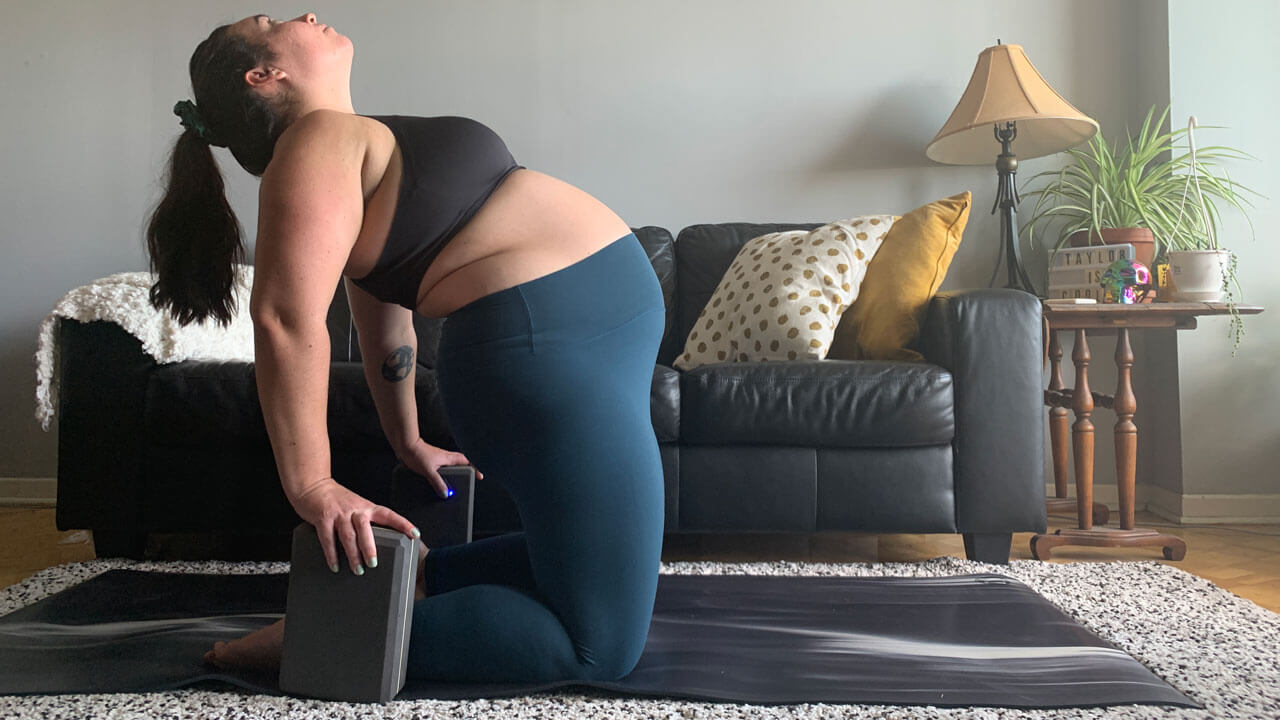
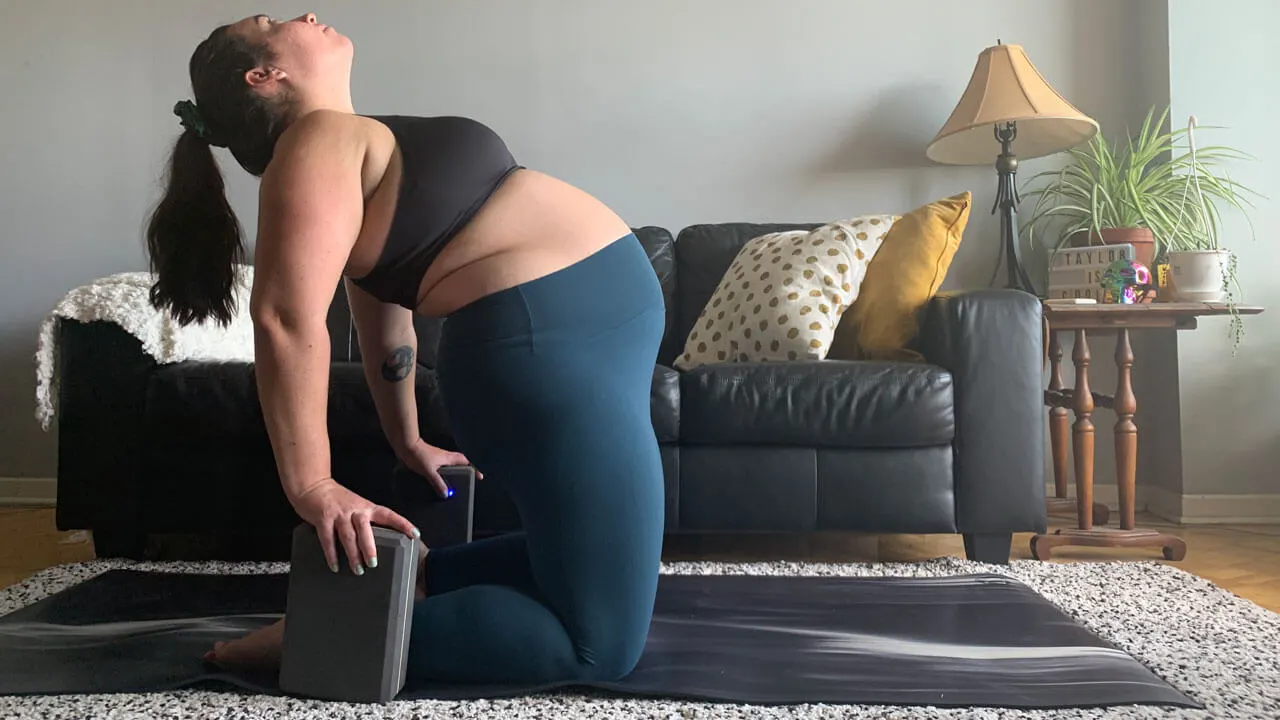
Reclined Hero Pose
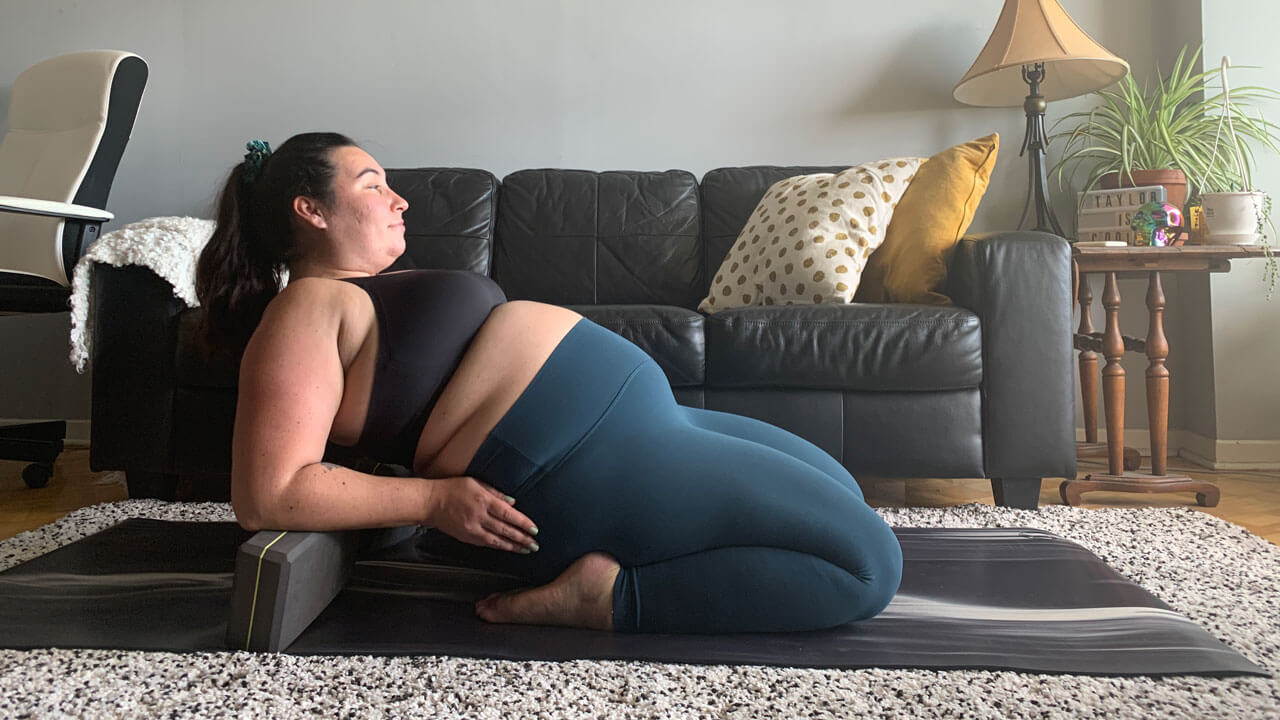

Place one or two blocks under your bum and between your legs to sit on. This helps with any tension or discomfort in the knees and may allow you to lean back onto your hands or elbows. I would caution leaning back on your elbows if you’re using two blocks and stick to resting back on your hands. You can always use two more blocks, placing each under your elbows and forearms as you lean back.
Supported Bridge


Place a block on the lowest height under your sacrum, the lower part of your back, and just above the cushiony part of your upper bum. Adjust the height to the second or third setting for a deeper backend. There is also the option to extend your legs at any height.
Easy Twist
Place a block under your hand that is on the ground for added support and more space to open your chest.
Half Splits
Place blocks under both hands at any height to stabilize your half splits. This will help you feel more secure as you won’t have to lean as far forward to reach the ground, especially if that isn’t accessible for your body. You always have the option to lean forward, with a straight spine, while using the blocks.
Front Splits

You have two options here. The first option is to place blocks on either side of your front thigh for your hands to help lower you to the ground with a straight spine. The second option, which can be used after using the blocks to lower you, is to place a block, typically on the lowest height, under the front glute.
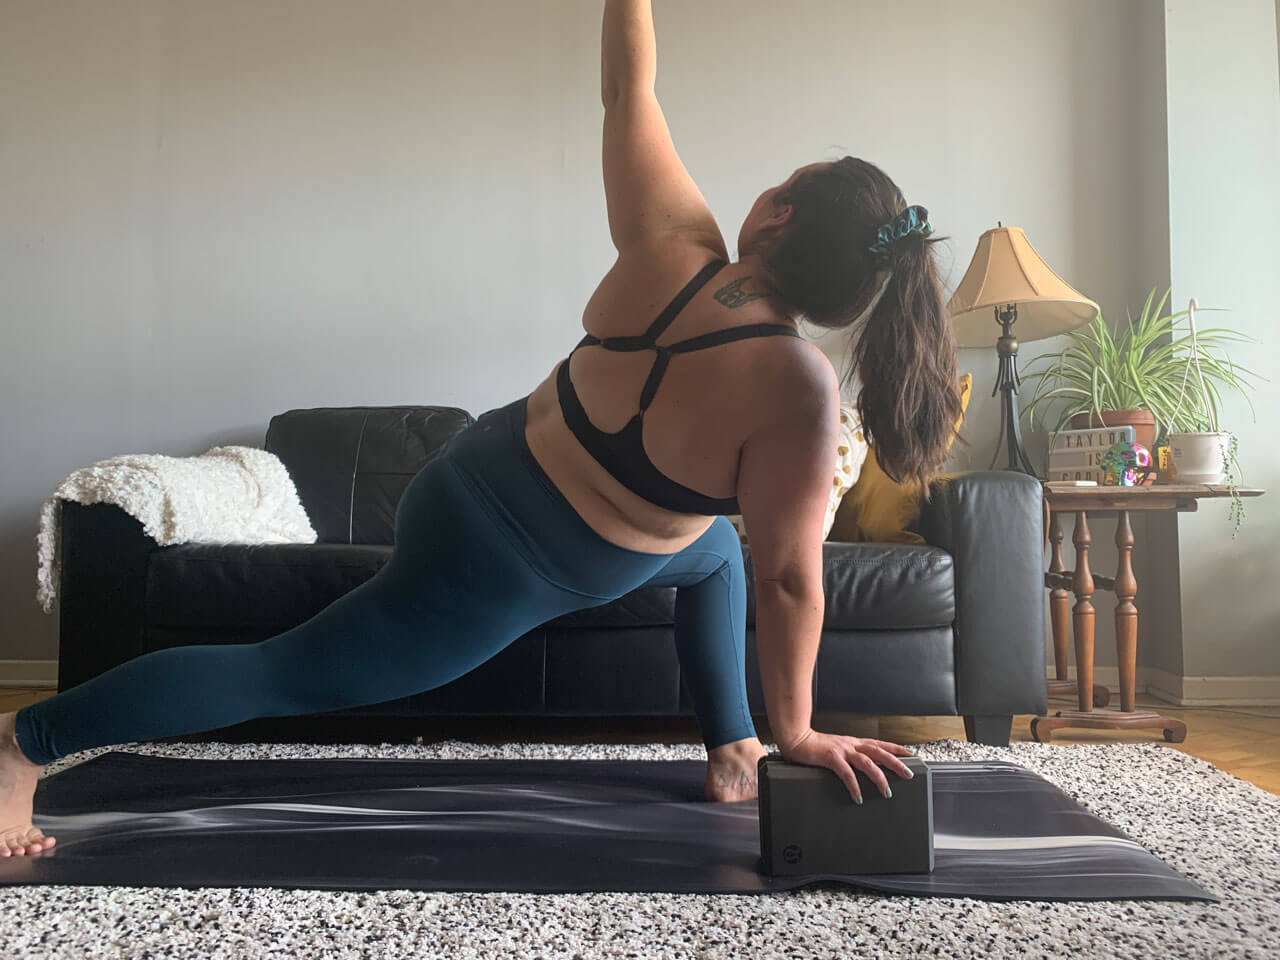
Triangle
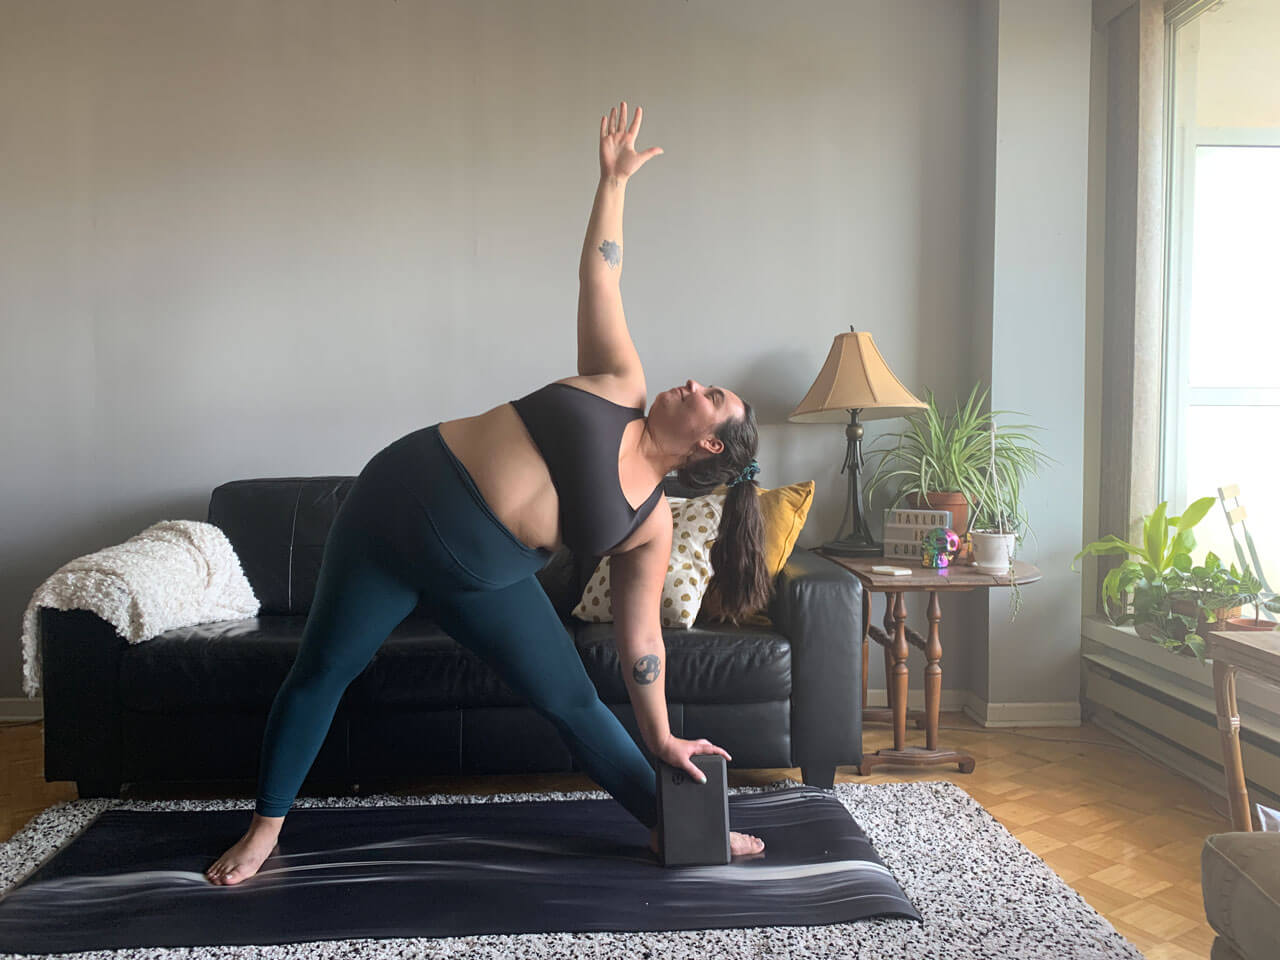

Place a block at any height under your front arm that is touching the ground or your inner lower leg to bring the ground to you. This will help with alignment by lengthening into both sides of your upper body and to avoid collapsing towards the ground. Be mindful of not dumping your upper body weight into the block. Use it as a guide, placing your fingertips on it. The block can be placed on the inside or outside of your front foot and can also be used for revolved triangle.
Extended Side Angle
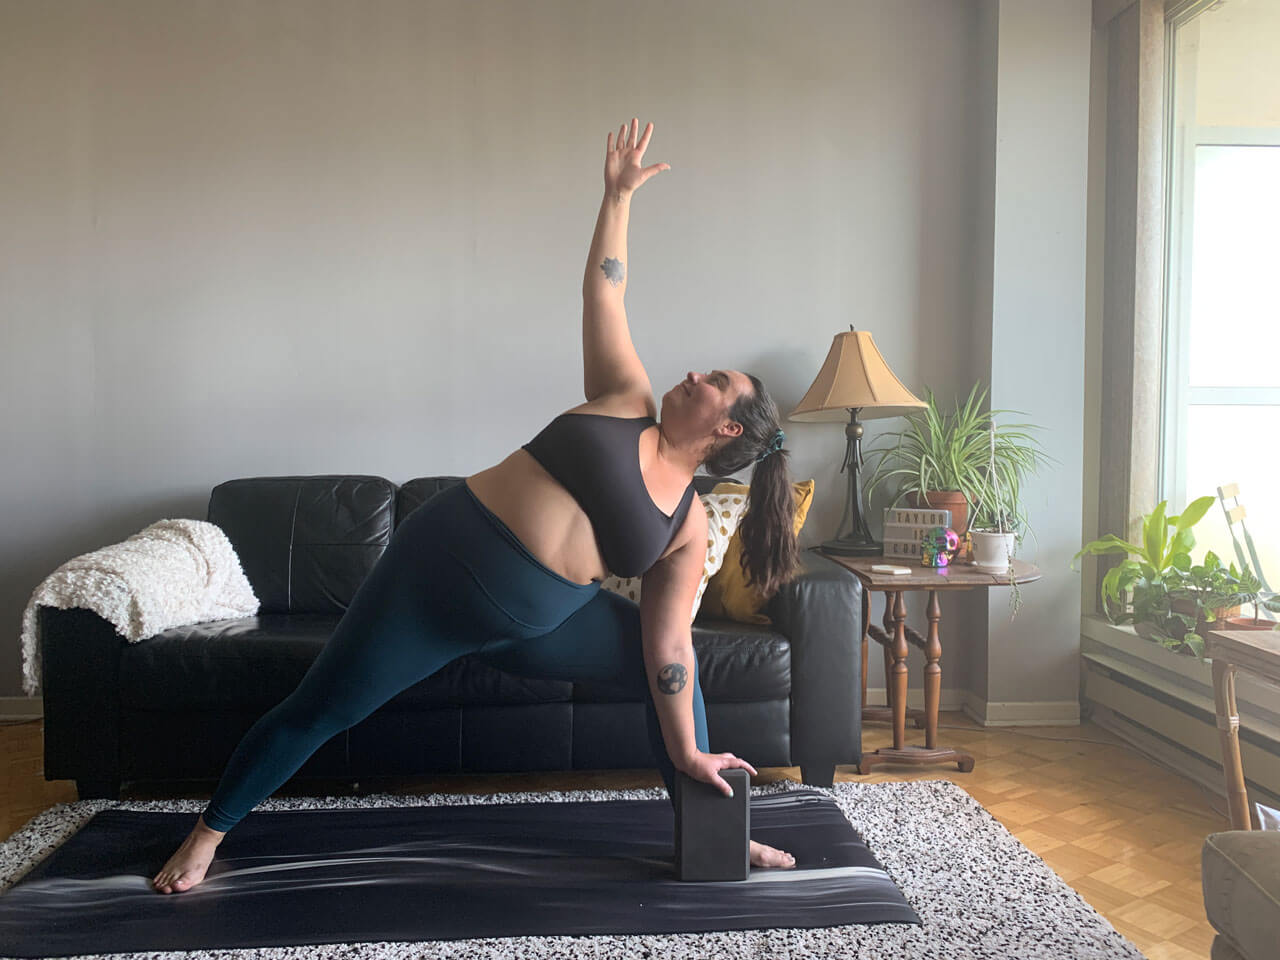
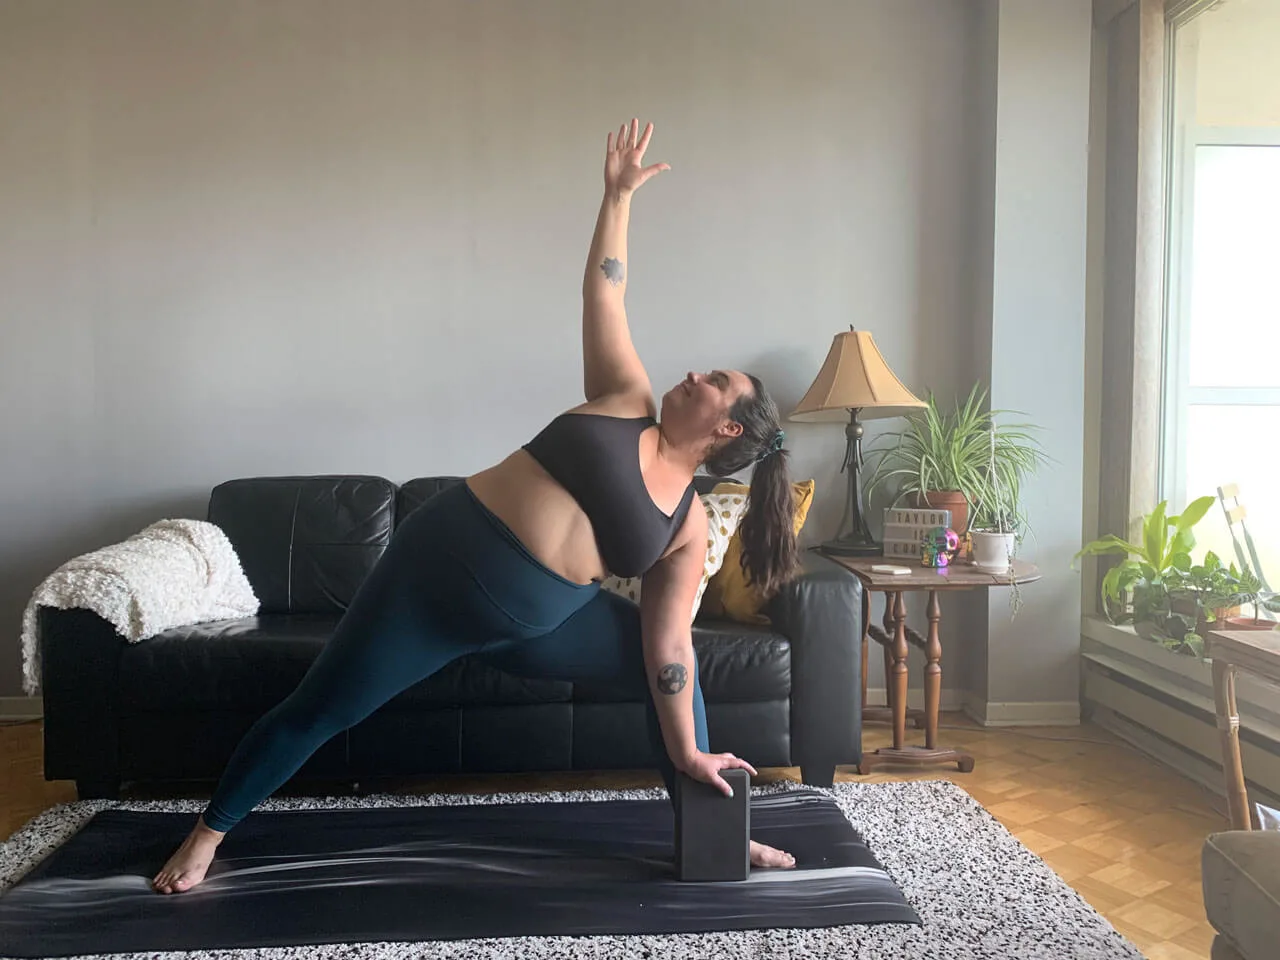
Use a block at any height by placing it on the inside or outside of your front foot to place your hand on. This gives more extension through both sides of your body.
Warrior III


If your shoulders dip below your hips place a block under each hand to bring your shoulders in line with your hips and leg that is extended back. This also helps with balance.
Half Moon


For balance, extension, and proper alignment, opt to use a block at any height under the hand that is reaching for the ground. Be mindful to use the block lightly and to avoid dumping your weight into the block.
Pyramid Pose
Use blocks under both hands to allow your spine to lengthen, give your hips more space to square off, and to have less intensity in the hamstring stretch.
Standing Splits

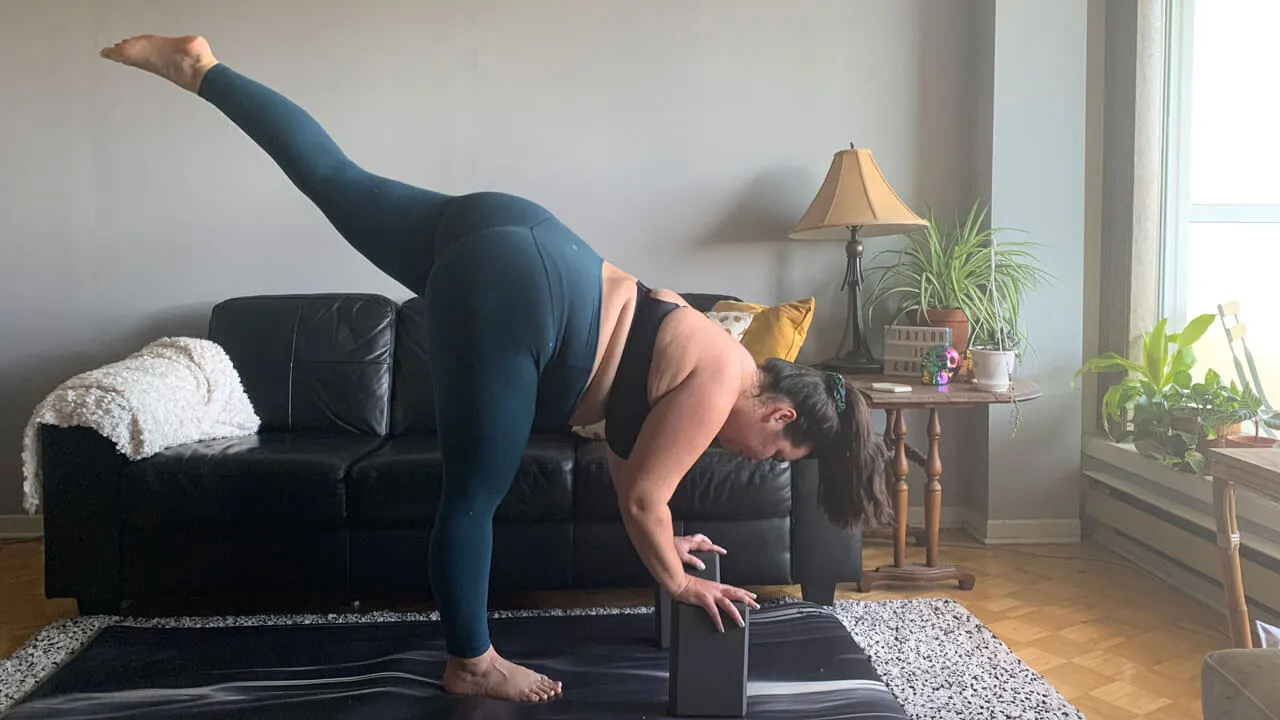
Trying placing blocks under your hands to bring the ground closer to you. Use the blocks to gently push into not only for support and better balance, but to help move your leg in the air higher. The more you push into the blocks or ground, the higher your leg will go.
Wide-Legged Standing Forward Fold

If this pose is too intense of a hamstring or hip stretch or a half-way lift isn’t really half-way then place a block under each hand, directly under your shoulders.
Camel Pose
In camel pose, you have the option to tuck your toes and reach for your heels, but if this isn’t accessible or doesn’t feel stable enough, reach for your blocks and place one on the outside of your ankles or shins. Start with the highest setting, and lower the blocks as you become more open into this backbend.
Crow Pose
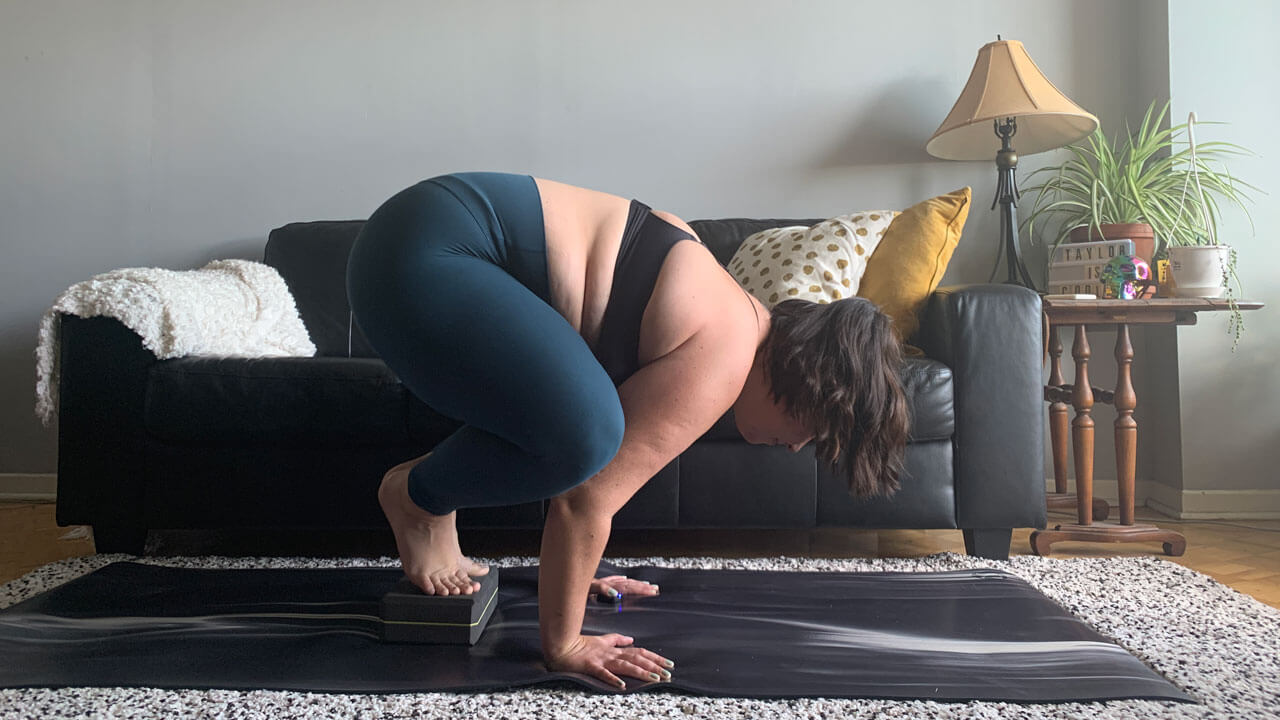

The most important part of balancing in crow is setting your hips high by bringing your knees to your arms. While you should be using your abs a lot here to hold you steady and to bring your knees in, using a block under your feet can assist you until you build your strength. Use the block under your toes to get your hips high and then place your knees. Trying lifting one foot, then the other, then both.
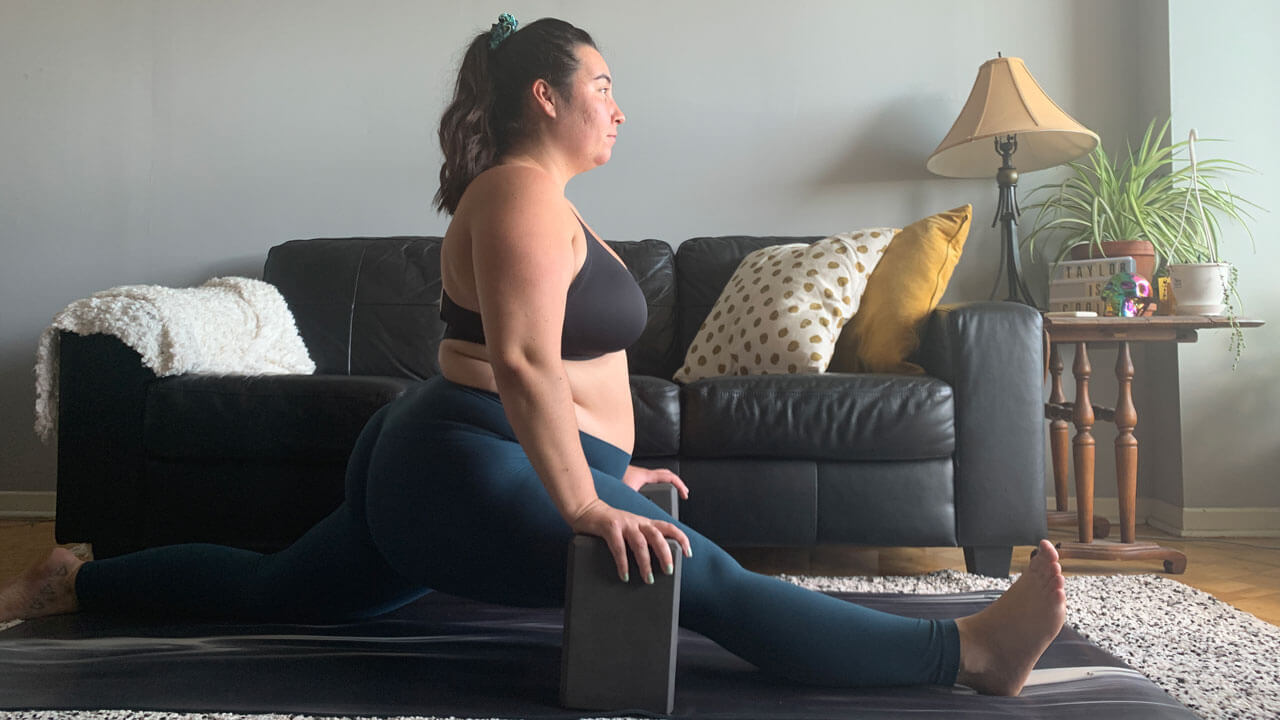
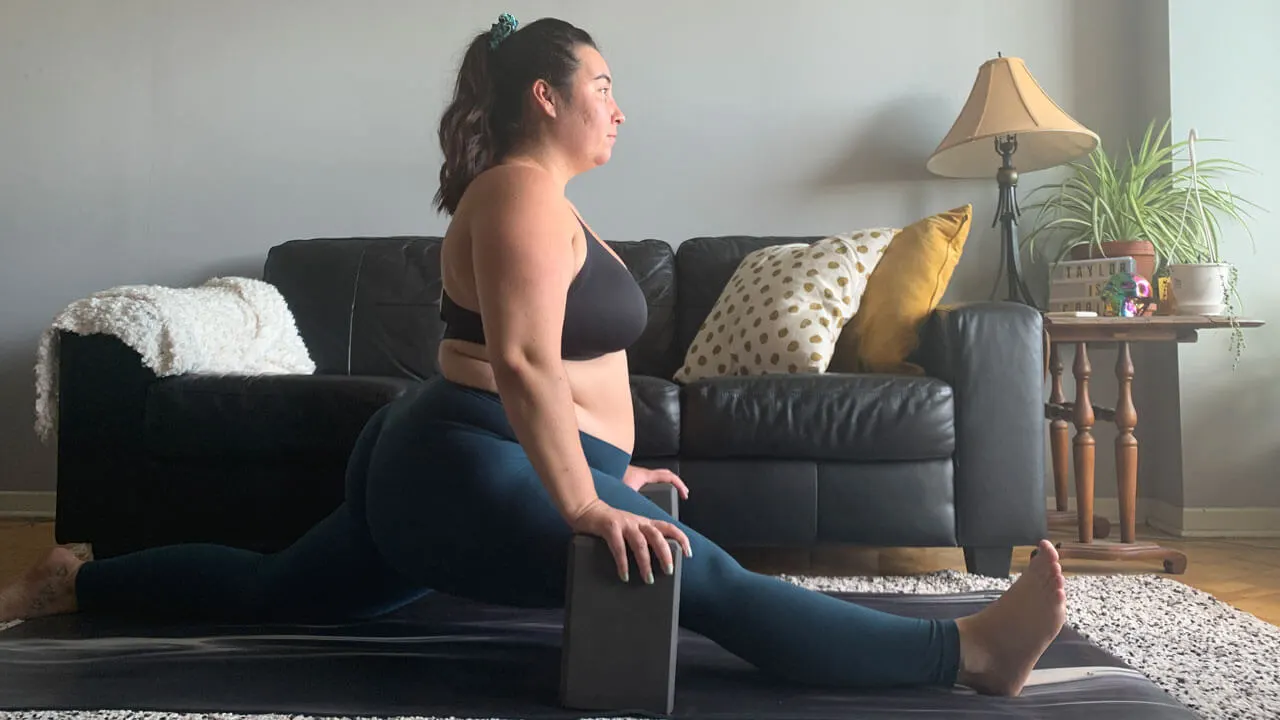
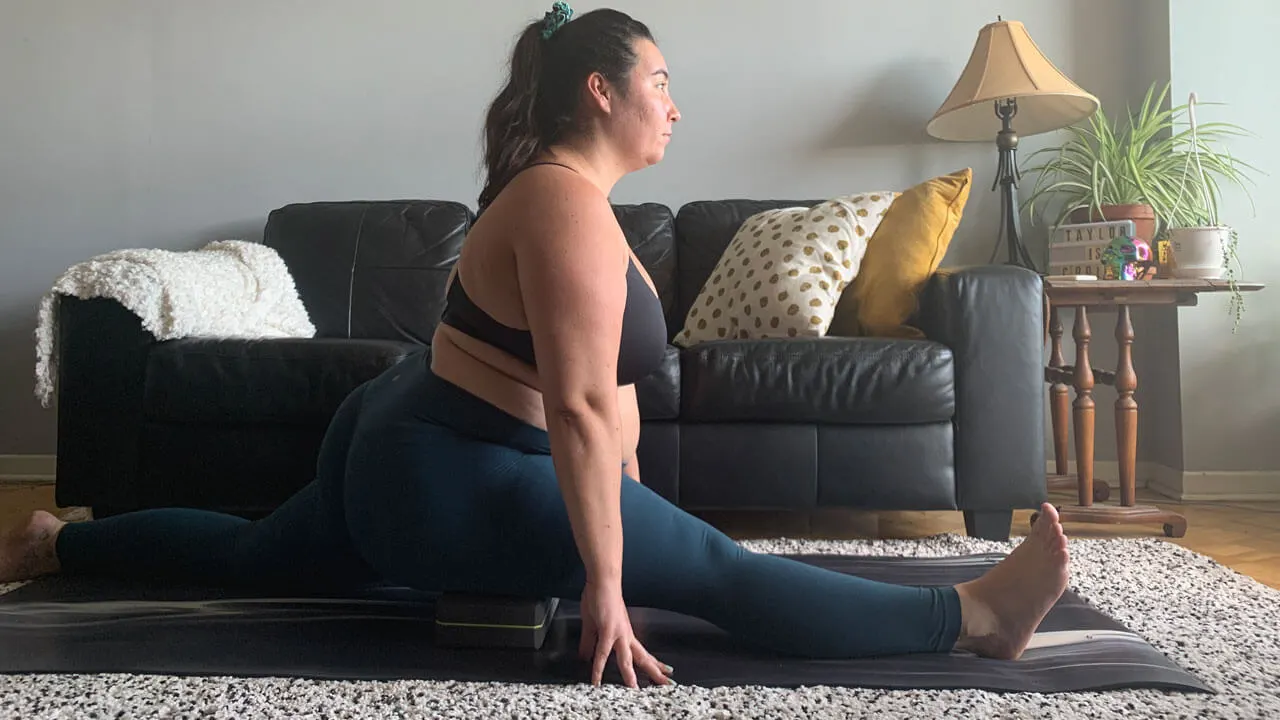
Lizard Pose
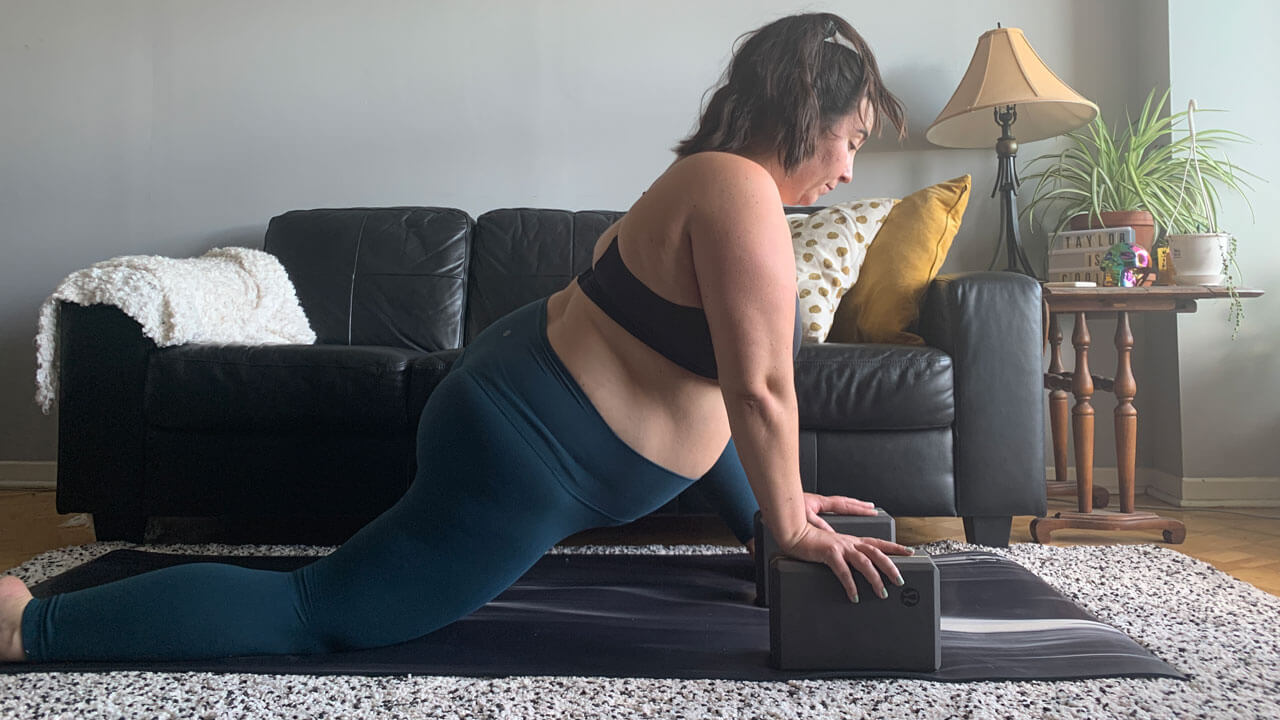


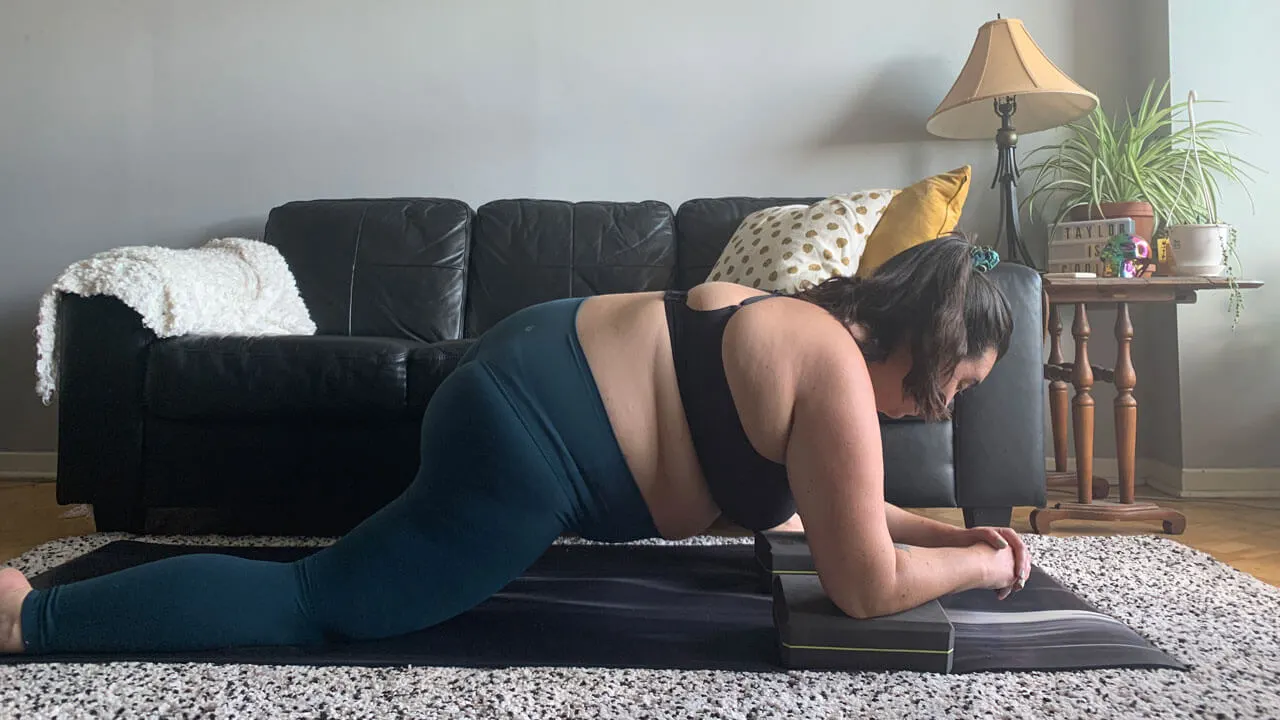
You have a few options for block placement in lizard. The first is to place a block under each hand if the pose feels too tight on your hip flexors. The second option is to place the blocks under each forearm or elbow.
Pigeon Pose


If your hips are uneven because one is lifted too far off of the ground, place a block under the glute of the raised hip. If you opt to fold forward into sleeping pigeon, you can place a block under your forehead.
Yogi Squat
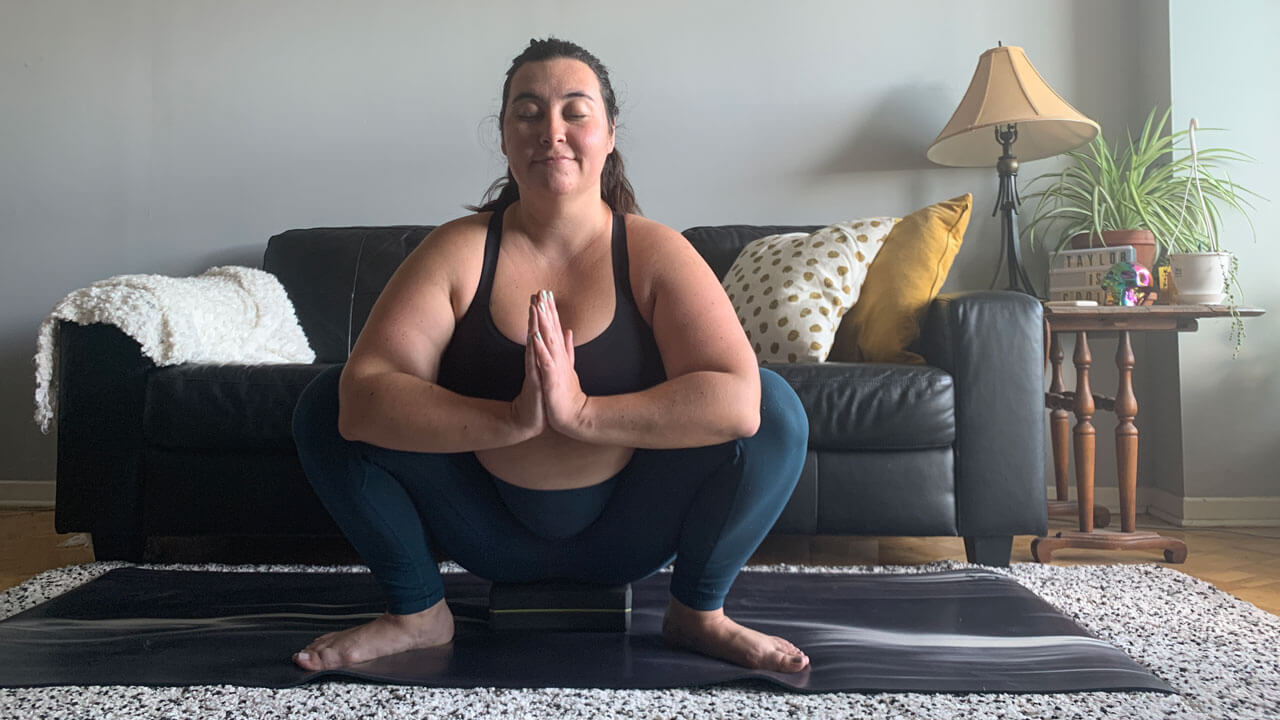

Yogi squat can feel quite inaccessible for many people, especially if it’s being held for more than a few breaths. Sit on a block or two to support your hips flexors from going too deep into uncomfortable territory.
Supported Shoulderstand
Shoulderstand is a lot, and for many, it is simply too intense. Another option for an inversion is to simply put your feet in the air while laying on your back but even this can be difficult to hold for long if it’s being used as a restorative pose. An answer that will help is placing a block on the lowest height, on the widest setting under your sacrum. This will elevate your hips, making it easier to keep your legs up so you can focus on using your legs by holding them up instead of on your core.
Seated Forward Fold
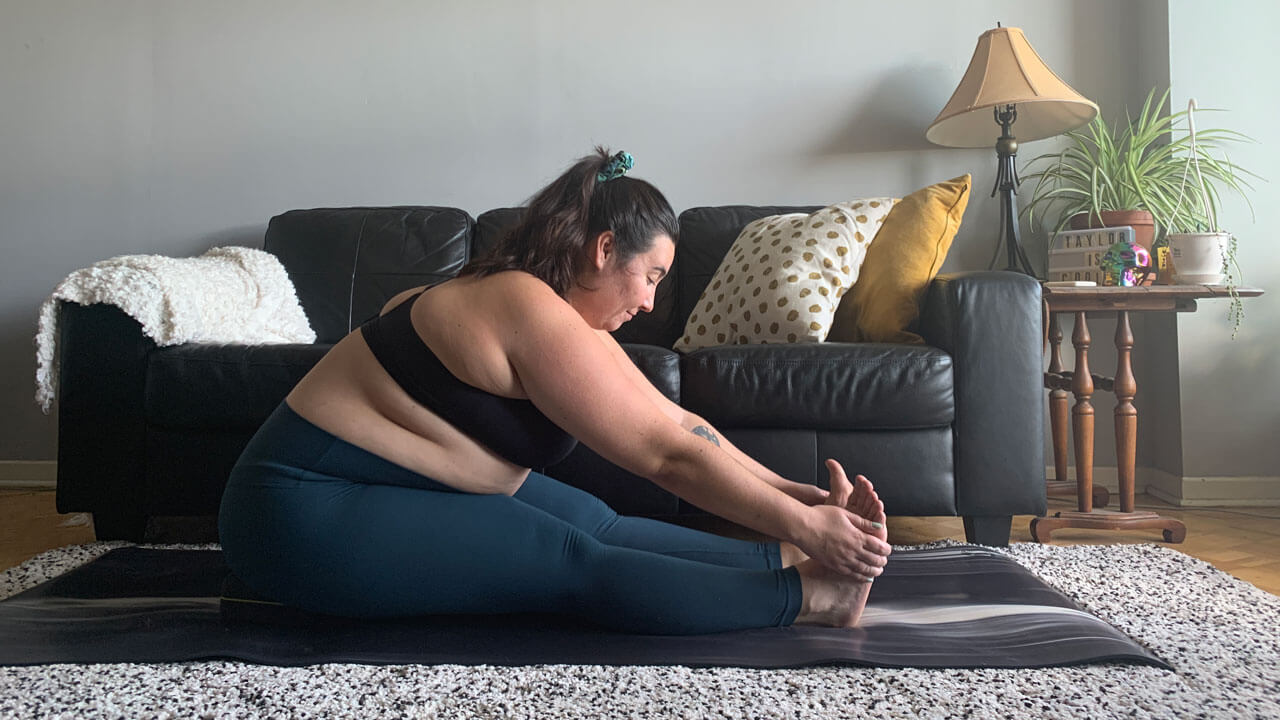

Sit on the edge of a block to tilt your pelvis forward. This allows you to keep a straight spine and makes it easier to fold forward.
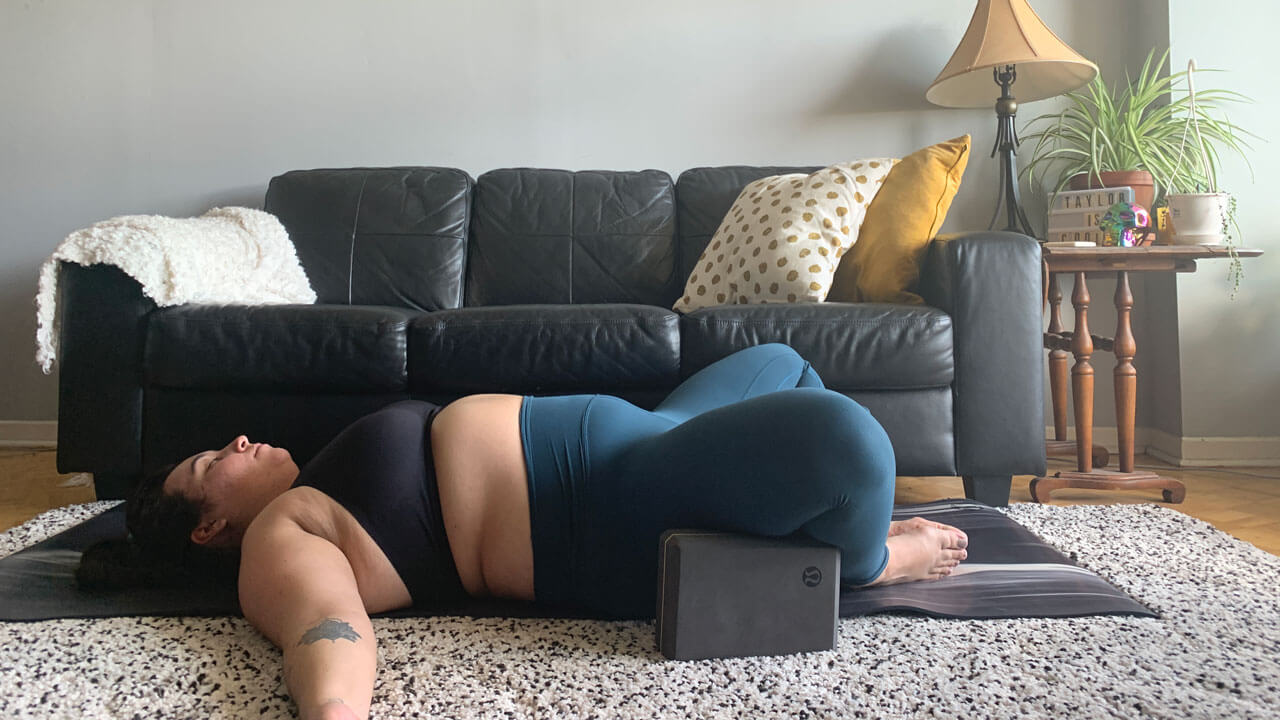
Supine Spinal Twist
If you are twisting with one leg extended long, place a block under your inner knee to of the bent leg to bring the ground to you and to make the pose more comfortable by releasing strain from your knee hanging out in limbo. If you’re twisting with both legs bent and knees together, either place a block between your thighs or under the thigh of the leg closest to the ground.
Reclined Butterfly

Use blocks under your thighs to bring some ease to your knees.
How to Use Yoga Blocks to Deepen Your Practice
These poses primarily help to strengthen and support your body as it leans into deeper variations of poses, including how to use yoga blocks to increase flexibility.
Child’s Pose

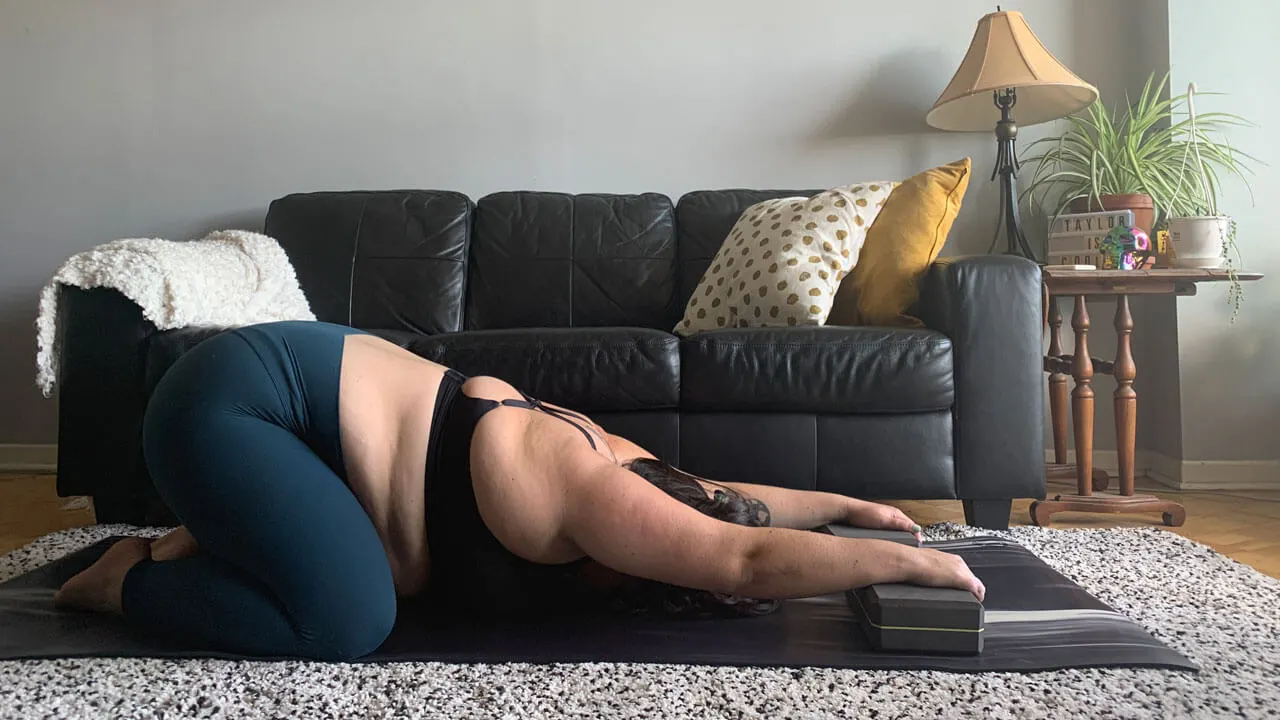
Place a block under each elbow/upper arm, bring your hands to meet and bend your elbows to bring your hands into prayer position behind your head. This creates more of a chest and shoulder opener. Another option is to place your hands on blocks and then melt your chest to the ground.
Puppy Pose
Just like child’s pose above, put a block under each elbow/upper arm, bring your hands to touch, and place them behind your head, just touching your neck lightly. Melt your chest to the mat, placing your forehead on the mat. A second option is to extend your arms and place a block under each.
Supported Fish Pose
You will most likely need to play around with your block settings for supported fish. Start with the block on the lowest height and place it length-wise down your spine between your shoulder blades. Allow the back or the crown of your head to rest on the mat. If this feels like too much on your neck, place a second block under the back of your head at the lowest or middle height.
Bridge Pose
Take the block and place it between your thighs, just above your knees on the middle height. It may feel better to give yourself more space, in this case use the longest setting between your thighs. You want to keep your knees and feet stacked about hip-width distance apart, maybe a bit further apart. Hold the block together with your thighs and maybe even try extending one leg out and then the other.
Chaturanga Dandasana
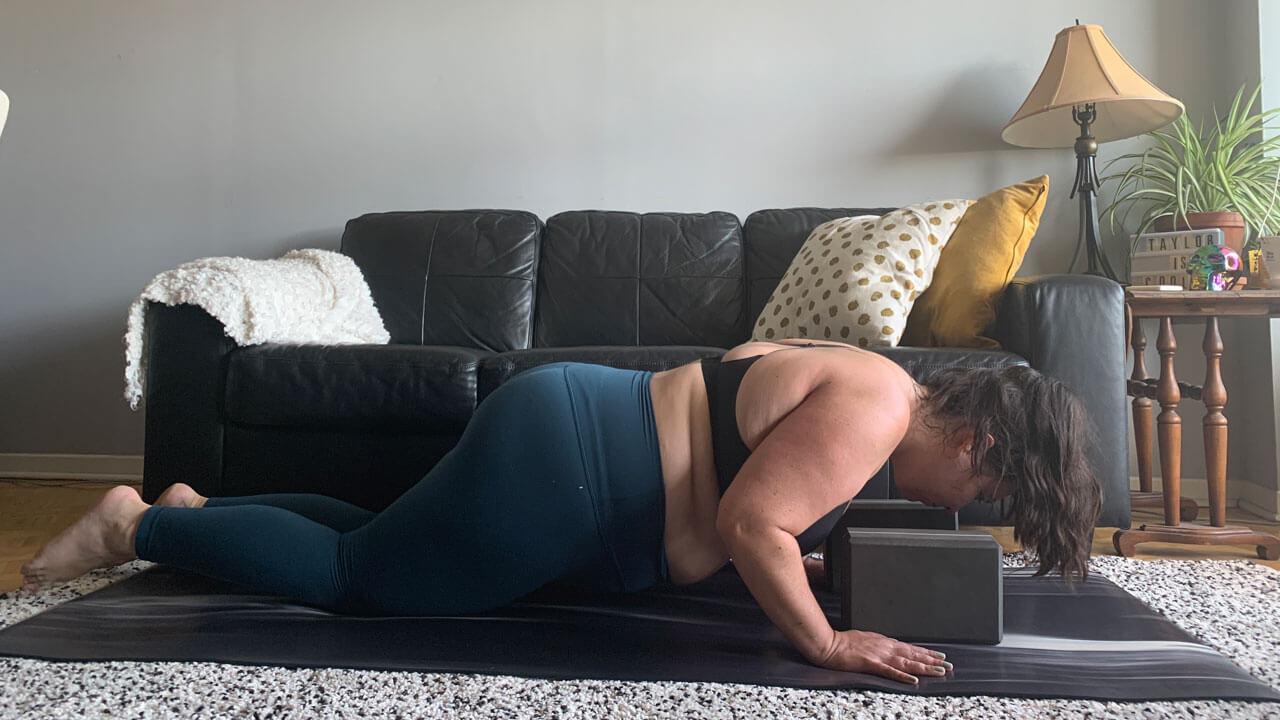
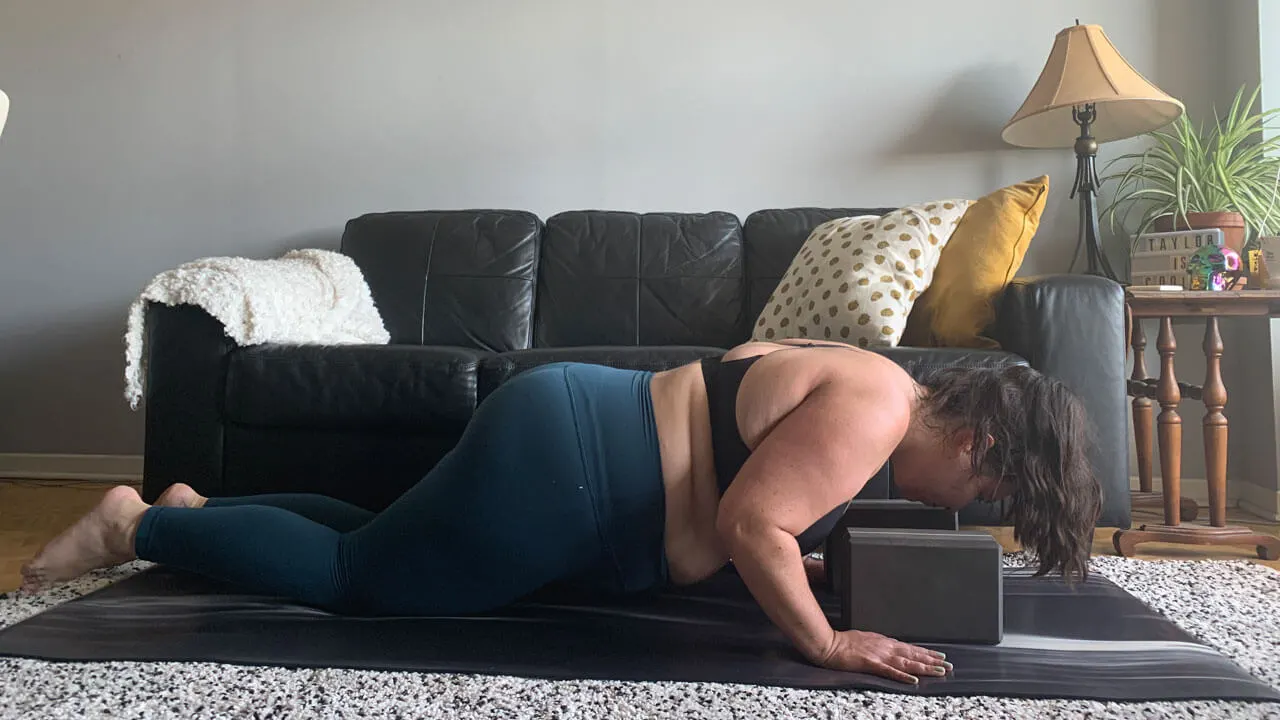
Using blocks in chaturanga dandasana makes you very aware of your body and greatly helps with alignment. Whether you are flowing through chaturanga on your knees or toes, you can use the blocks the same way. Place the blocks at the highest setting right in front of your hands. Rock forward so that your shoulders move just past your wrists and then lower until the front of your shoulders just brush the blocks. Hold here and push back up. This height is where your shoulders should be coming to and prevents your shoulders from dipping too low which also prevents injury.
Reclined Hero Pose
If you can lean back into hero no problem, trying adding a block length-wise down your spine between your shoulder blades to add a chest opener to the pose.
Sun Salutations
To really step up your sun salutation for a challenge, hold a block between your thighs through your entire Sun A. Start in Tadasana (mountain pose), continue through a forward hold and a halfway lift and then float back to chaturanga dadasana. Move into cobra or upward facing dog, the block helping to keep your hips off of the mat, and push back into downward-facing dog. Float forward, using your core more than your legs to move you forward. Inhale to a halfway lft, forward fold, and then return to Tadasana on your last inhale.
Using a block through a Sun A sequence will light up your adductors (your inner thighs) and encourage you to use your core strength more. Engaging both sets of muscles will greatly increase stability and help to strengthen.
Boat Pose

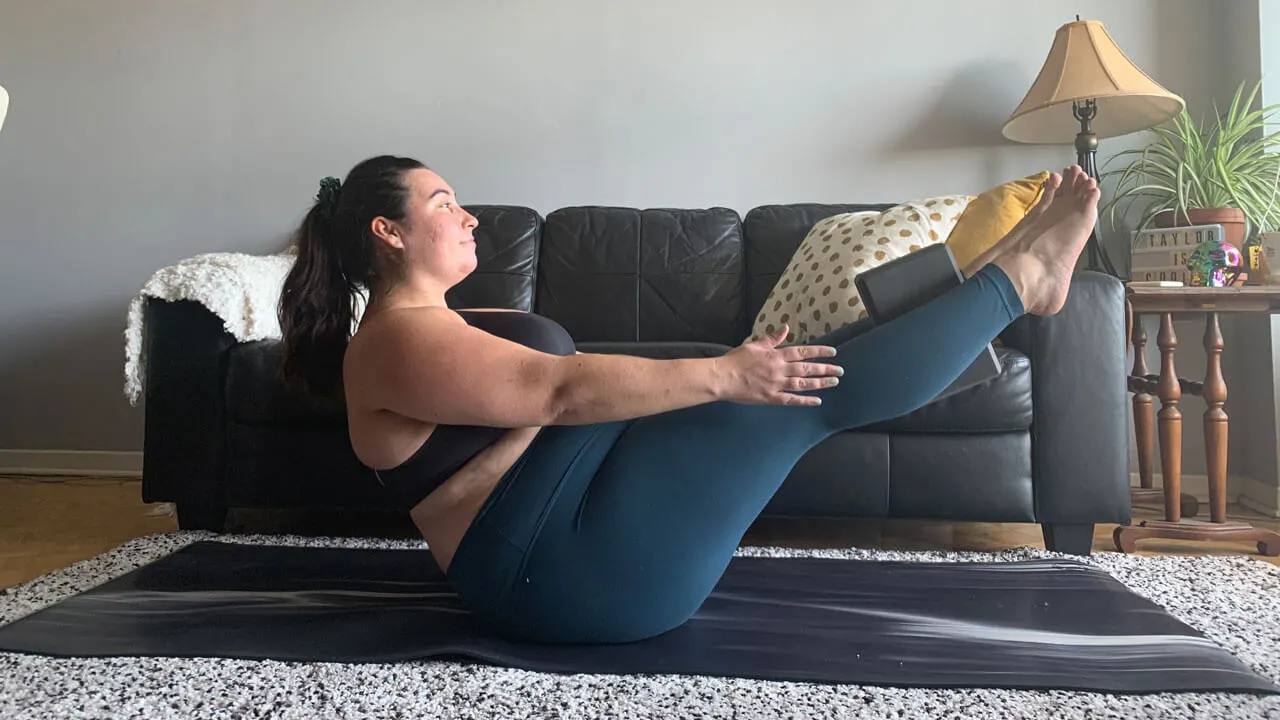
Use a block between your inner thighs if your legs are bent, or just above your ankles if your legs are extended. Squeezing on the block to hold it in place will encourage your abs to kick in and provide more support.
Arm Extensions
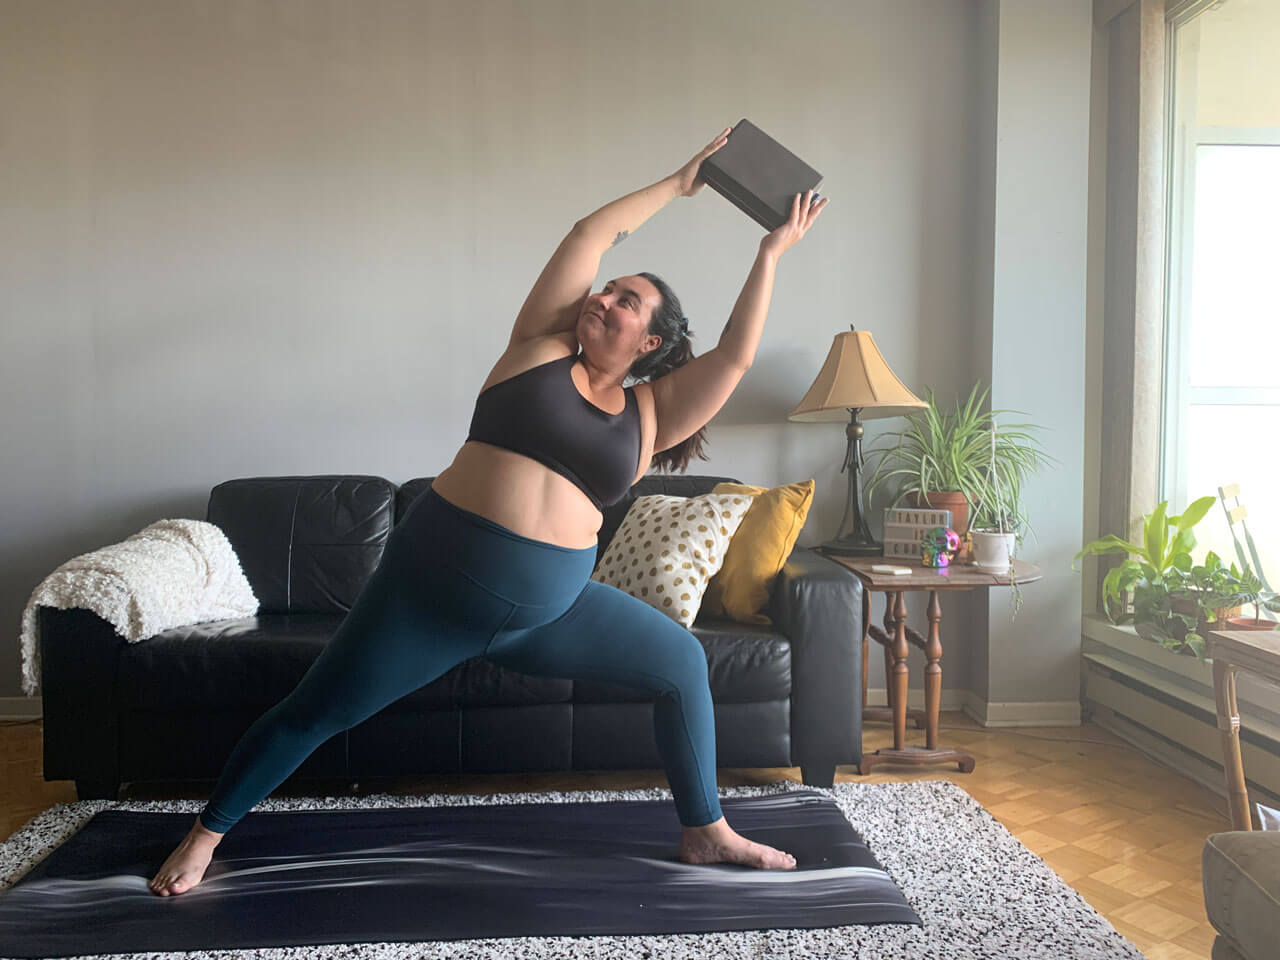
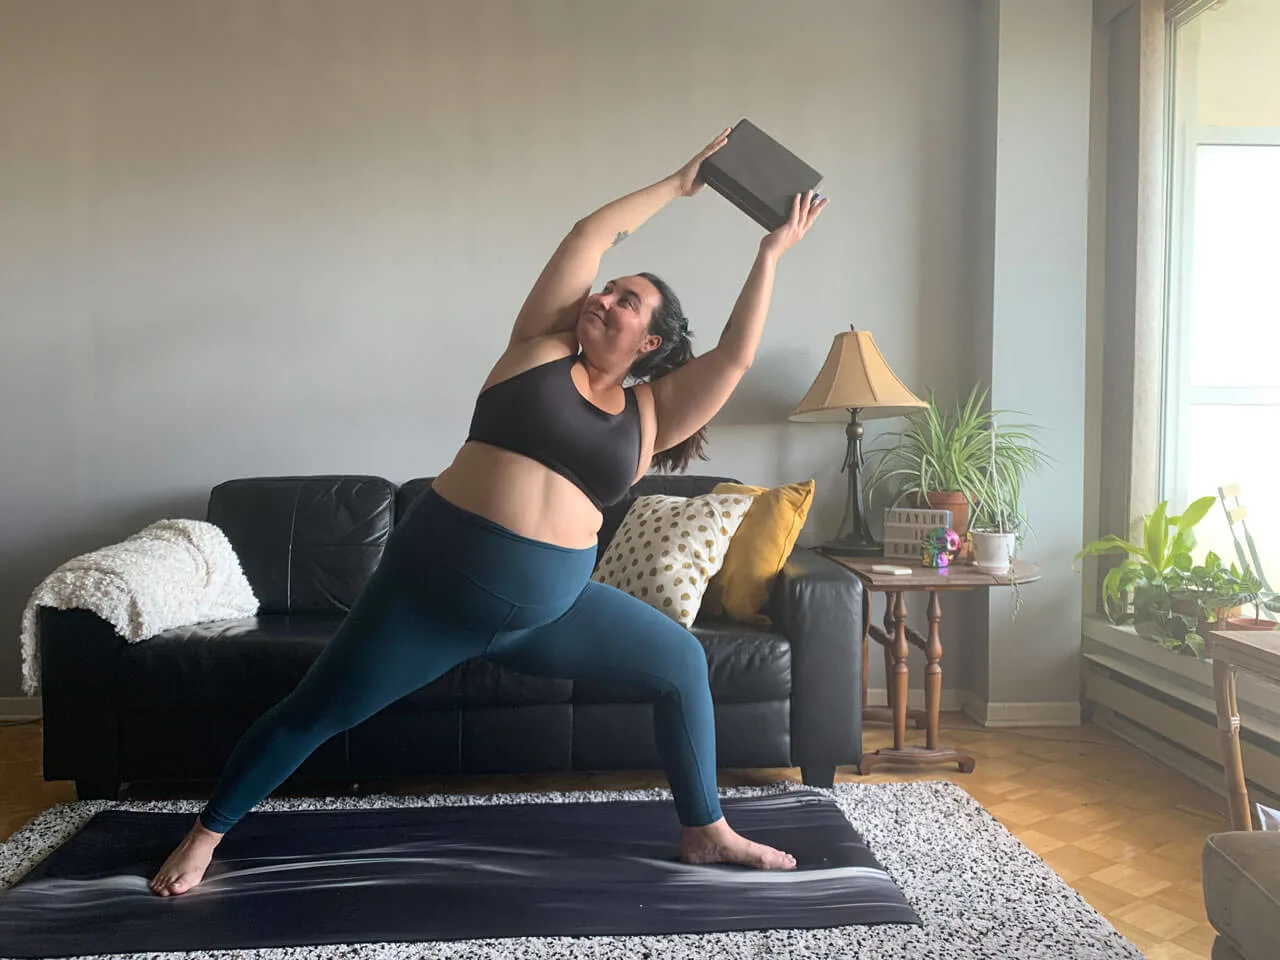
This option can be used in a number of yoga poses including triangle, extended side angle, warrior I, II, and III, Tadasana, tree pose, high lunge, chair, and more. Basically in any standing pose where you have the option to extend your arms, you can add a block between your hands to hold onto. Extending your arms will not only help to build shoulder and arm strength, but also your core and those lovely muscles between your side ribs, your serratus anterior.
Chair
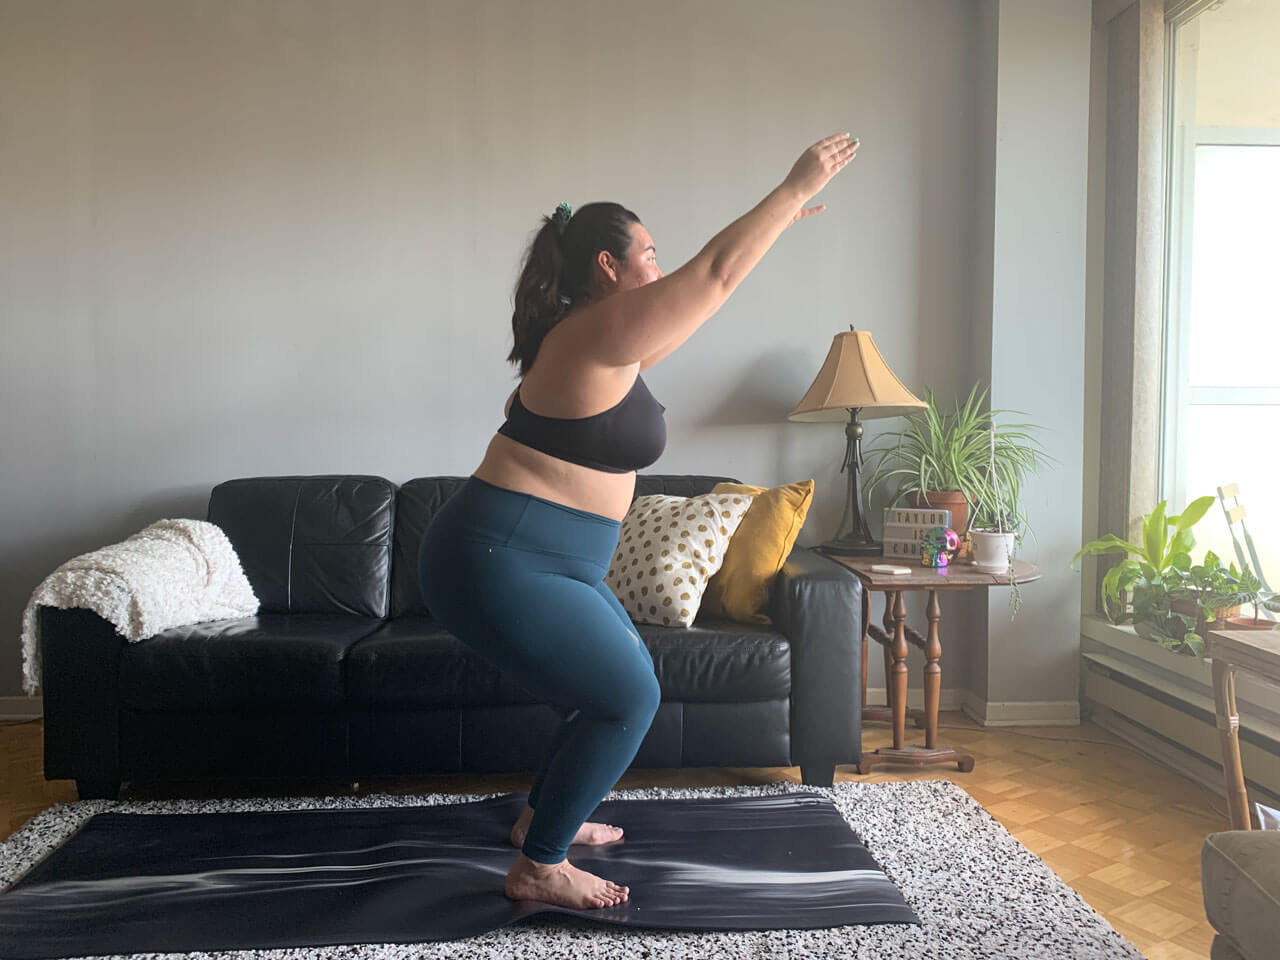

Use a block between your inner thighs, making sure to use a width that feels good for your hips. This helps with strength and stability and encourages you to try chair with your feet hip-width distance apart instead of together.
Reclined Butterfly
Reclined butterfly can be made into a chest opener, deepening the pose. You can still use blocks under your knees if that feels good too. Place a block lengthwise under your shoulder blades and allow your chest to open.
Enjoy exploring your practice like a beginner with these yoga block suggestions!